Growing great organic foods in healthy, thriving, pretty, no-dig gardens.
Search Results
200 results found with an empty search
- Sunday Bits Of Inspiration #92
Happy Sunday, friends. I am over the moon today as the landscapers finished the backyard reno yesterday. At first, I was a bit taken aback at how much lawn we actually ended up with, but today, I am in love. We had originally planned to make more pollinator beds, but honestly, with an active St Bernard, we would have had to put them all beside the house, as foundation plantings. I am not a huge fan of foundation plantings as they can cause water issues, something I would rather avoid. So, we added fewer beds, more space for Berkeley to zoomie and loll about in. Plenty of time to add more beds later on. Better when the yard works for everyone. The only drawback now is that we are having 30 degree days, have a brand new lawn, and no rain in the forecast for at least 2 weeks..... the water bill is going to suck! So, here are this week's Sunday Bits of inspiration.... This yard with it's cool hued native, natural garden strikes a note with me. I would totally have done this on the island, where we get little to no water in summertime. At this new house, I am trying to figure out how to incorporate it into my front yard (next year's landscaping project). I absolutely love this look. I can make it work if I use colour (blue and pink) where she has silvery touches. Leave the caterpillars in the garden ? Would you do this? How do you all feel about AI in your garden information? Are you okay with the pictures just because they are pretty? Most of the pics in this article make me shake my head, they are so incredibly staged and/or altered. Very pretty, but so unrealistic. These sheds , on the other hand, are very pretty. This article about how to clean your outdoor furniture. I must admit, I was just planning to put everything away and clean it in spring, but cleaning the cushions and stuff that comes indoors now, make a lot of sense. I really need new cushions though... How to re fresh old potting soil. Whether you want to do this now for your fall planters, or wait till spring (you may want to pin this). I am refreshing for fall, will throw some of the potting soil into the raised beds before putting the pots away for winter (make them lighter for the shelving), but will leave it in the big ones to refresh in the spring. Any pots growing foods, I start from scratch each year. Homey Bits I have no home or decor bits to show you this week. Everything I see is pumpkins and woolen throws. I am not quite there yet... though I do like this pumpkin that you see below! These three items are all from my shopping cart. The first jar is on sale, the second one comes in many sizes and shapes. I love these round, tall ones. And well, love that pumpkin! Vintage storage jar with bamboo lid / Glass storage jars with sealable wooden lids Glass pumpkin candy jar *As an Amazon affiliate, if you purchase an item from one of these links, I make a teeny bit of money to support my blog. It does not cost you a penny more than it would if you went to the item on your own, without my link. Huge thanks : ) Recipes! I have some of the very best recipes for you this weekend! No, there is no pumpkin anything. Sorry! Though a nice baked pumpkin doughnut is on my agenda in another month or two... right now, though, I am in apple mode! Like these Baked Apple Cider Donuts. Okay, I lied.... just as I wrote this, a post come into my emails with how to make your own pumpkin spice. If you are a fan and need this spice in your life, here is the recipe to diy it! The Sweet Bits Check out these A pple Crisp Bars . They are on a shortbread crust, so similar to the raspberry crumble bars we made earlier, but this recipe has NO sourdough! If you are no on the sourdough train ( I hear ya!), use this base for both the raspberry bars and these yummy apple bars. I am thinking of making these for the family bbq supper tonight. Or.. how about some Apple Cinnamon Rolls ? I have thing for cinnamon rolls of any kind! Doesn't everyone? I know when someone offers them up at our coffee klatch, we all go crazy for them. Make these rolls with your own homemade Slow Cooker Maple Apple Butter, if you can. This recipe is on my must make list. Not gonna lie. Even though I am not a marshmallow fan, these Toasted Marshmallow Brown Sugar Cookie Bars look amazing. Will definitely make them for the clan. The Savoury Bits Sheet Pan Veggie Bowl. All the ingredients cooked in the oven on one cookie sheet. Perfect. I love these meals, especially when hubby (the family chef) is not at home! Mexican Street Corn Salad . This look amazing. And everything is available at this time of year. 22 Light Lunch Recipes . These all look good! I have pinned several of them, but the first one is my favourite. Do you have a glut of tomatoes? Wondering what to do with them? Why not make your own ketchup? We have been making our own for years now. I got tired of the excess sugar and corn syrups that the store bought ones have, and so we started making our own. Healthier and tastes like... tomatoes! Gasp! Here is a recipe that popped up in my feed today, and here is o ur recipe . Feel free to add a bit more sugar if you like. Hubby likes his a bit sweeter, as does our granddaughter. That is all for this Sunday's Bits post. I am off to make this cake to take with me to the family bbq dinner tonight. I hope you all are having a fantastic labour day weekend, with no labouring involved! Unless, it is something you want to do! I will be emptying more flower pots ~ Tanja.
- Late August In The Potager Garden
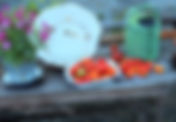
Here we are at the very tail end of August, with autumn most definitely in the air. It's in the cooler nights, morning dew, some much needed rain, harvests, and garden clean up. This morning was just 8°C and sure felt chilly, but I'm not worried (maybe just a little bit). The past two autumns have lasted well into October, so fingers crossed for another spectacular one. We had a very windy, cold, rain day, so it sure felt like fall was here. However, has since shifted back to sunshine and warmth again. We did not get a lot of rain where I am, just over 1/4 inch, but every bit of moisture helps as it has been so very dry. I was watering everything the day before the rain, in preparation for the upcoming moisture. I'm sure the neighbours always think I am crazy when I stand out there giving everything a good drink while storm clouds gather above. When and why is it a good idea to water just before a rain shower? Why? It helps your soil absorb the rain better, go deeper into the soil. if your soil is hydrophobic (repelling water), damp surface soil will help absorb the rain when it arrives, instead of running off, or pooling in pockets. Even if it is a light shower, the water will go many inches deeper into the soil if already damp. Otherwise, it just ends up as surface water, which evaporates in no time. Pots, planters, and hanging baskets have so much foliage and flowers that the rain will not come closes to reaching the soil. They will be limp and dry mere minutes after the rain stops. Both need a daily good soak at this time of year. If you are planting new seeds or plants. Water them after planting, the rain will soak the soil around them to help them establish faster, prevents wilting. Established shrubs, trees, plants will get a deeper soak. Garden Clean-Up It is time... things are getting tired looking. I compare my baskets, pots, and gardens to last year... not even close to the same. Last year, things were looking spectacular at this time. If you are a townie, like me, you are probably also spreading out your garden clean up to fill your green wheelie bin (organic waste bin) to the brim each week. We sold hubby's pick up this summer, are now down to one vehicle, so spreading out the compostable material is a necessity in order to get rid of everything. Luckily, we can borrow a truck from family, and can fill our neighbour's wheelie bins, should we need to. Get rid of tired baskets and potted plants. If most of the plants in the pot still look good, just pull out the tired, ugly plants (lobelia, bacopa, alyssum, petunias) and replace with something new, or something from another pot that is thriving. I ended up with 5 empty flower pots and filled the empty pockets with happy geraniums and trailers. Less pots to water, everything looks full and pretty again, for a bit longer. I have decided that I am never buying pink petunias again . I truly hated them so much, lol. Much less petunias next year, in general, unless I can find petchoas ( a cross between a petunia and a calibrachoa). They bloom forever and stay compact (often sold as SuperCals). Will stick to geraniums, begonias, trailing flowers, and greenery. To prune or not to prune? Prune your finished perennials to promote a late flush of new blooms. Plants like salvia, catmint (nepeta), veronica, monkshood, delphiniums, dianthus, campanula. They may give you another flush, they may not, but it never hurts to try. Take cuttings of the salvias now, if you are looking for more of them. I am so in love with salvia that I am planting them everywhere for the hummers, bees, hoverflies. I have not seen many butterflies here, but I know they like them, too. Roses ! Let them do their thing. If you prune them now, you encourage new growth, so they will likely not have time to shut down properly for the year... meaning, you will lose them in winter. Allow them to make and ripen their hips. Echinacea (and rudbeckia ) - coneflowers will still be making new blooms, and finishing others. Allow them to finish off in their own time. The bees, pollinators, and beneficial insects will love the finished blooms as much as they do the new ones. The birds will enjoy them later in the season. Shrubs and trees . Pruning promotes new growth, something we do not want this late in the year. If you need to prune off long branches, wait till it goes dormant. Cutting off anything dead, broken, or diseased can be done at any time of the year, though. Herbal Harvest If you have potted herbs, like thyme and oregano , it is getting close to the time when you can plant the hardy ones into your garden. Trim plants to 3 inches, plant into the ground. Doing this now gives them enough time and energy to root in so they overwinter (which they will not do in a pot, here on the prairies) and come back in spring. On the island, I planted near all the herbs into the garden in fall (except parsley), but here, just thyme, tarragon, chives, and garlic chives. Yes, mint is hardy here, and spreads like crazy. To bring in your rosemary. Rosemary is hardy to a zone 5 (though you can still lose it in a hard winter in a zone 7) so if you don't want to lose it, bring it in for the winter. Hates wet feet, put it in a clay pot, water when soil feels dry. Place it in a cool, but very bright window. Loves light and bright, but not the heat, so do not place it by a heating vent. If you are in a bit warmer zone, it will love it in the greenhouse. With your trimmings, make herb packets for your soups and stews. Cracking Tomatoes? I have had several people ask me about circular and vertical cracks on their tomatoes. These are growth cracks. They tend to happen after a good rainfall, or sometimes if you forget to turn off the weeping hoses in a timely manner (ahem, oops. I may have done this a time or two on the acreage). This is another reason to lightly water before a rain. The flesh of the tomato will grow faster than the skin can keep up with, so it causes cracks. If the cracks are circular around the top, they usually heal up just fine. Are not the pretties, but are fully edible. The cracks that go up and down tend to be more problematic. They do not close, bacteria gets into the tomato causing mould to start up. If you get them right away, they are fine to eat. If you see any black or grey mould starting, toss them in the compost bin. Journaling! Don't forget to jot down notes while things are fresh in your mind... Write down your ideas for next year. What plants you loved and want to buy again... which ones not to (petunias!) Colour combos that you really like. (white and green, with hints of pink) Plants you want move, and where. Where you are planting your tulips, crocuses, daffs, etc... Your garlic map, if you plant assorted varieties. Your fall sowing so you do not weed them out. I like to keep track of the daily weather, too. Temps and conditions. The Farmer's Almanac Planner / Russel Hazel Planner (I have this one - love it!) Riley's 18 month Planner *As an Amazon affiliate, if you purchase an item from one of these links, I make a teeny bit of money to support my blog. It does not cost you a penny more than it would if you went to the item on your own, without my link. Huge thanks : ) Vegetable Harvests & Clean Up I just went through my brussels sprouts and yanked out 5 of them, leaving me with 6. If your brussels have no sprouts yet, is probably not going to have enough time to make some. If you have small sprouts, remove the bottom leaves and yellowing leaves. Keep watering them once or twice a week with a good, deep water. This would be a great time to give them a shot of seaweed, too. My daughter was on the island this summer, visiting family, and brought me back a big 4 liter jug of the best liquid seaweed on this planet. I should be set for the next couple of years ; ) I use it as a foliar feed for summer veggies, flowers and seedlings in spring, as a water in for a gentle boost, and also as a root booster. This stuff is magic. Dahlias love it! Check here for my other favourite seaweed, kelp, and organic fertilisers. I have thinned out the tops, extra foliage, and all the flowers off of my tomatoes . Finally harvesting some from the greenhouse, while the ones out in the garden beds have just the lightest tint of colour. Yay! I gave them a shot of the seaweed, too, hah! I use that s##t on everything! Even used it to transplant my flowers the other day. Zukes, cukes, and squash will start to get powdery mildew, or spotted ugly looking leaves. This is normal as we start to get into cooler nighttime temperatures. For squash and pumpkins with trailing vines, you can take off the leaves to slow down the process, but do not stress about it. If you want to leave, just leave it. Powdery Mildew will not affect the ripening of your pumpkins or spaghetti squash, etc. Thin out some of the foliage on your zucchini to slow down the process. This will let in more sunshine and airflow.. as Martha would say, it's a good thing. For cucumber vines, if they are still producing and have green, new leaves at the top, cut off all of the speckled, yellowing, or mildewed leaves. This will keep your vine happy and producing cucumbers for weeks yet. And, yep, you got it, feel free to give them a shot of the seaweed, too, either water in, or spray on the foliage. I made another jar of those fantastic ' Crunchiest Fridge Dill Pickles You Have Ever Tasted ' again. While the cukes were late coming in, I'm now getting a jar's worth once or twice a week. There is nothing better tasting than these small batch pickled cucumbers! Or any veggies, for that matter. They stay so crunchy! Check out the recipe to see how to do it! Garlic . If you have not already ordered your planting garlic, is time to start looking. I am getting several bulbs of Red Russian from a farm in Nanaimo to add to my collection. I also recommend Rasa Creek Farm . That is where I've purchased mine from over the past dozen years, or more. You can also check local farms and farmer's markets, Kijiji, and fb marketplace. If all else fails, scope out any garlic farm on Facebook and you will soon get tons of garlic farms adverts in your feed. Guess how I know, eh ; ) Ps, that farm in Nanaimo also happens to be for sale if anyone is looking for a great organic gardening opportunity, with instant income opportunities. We plant garlic, here on the prairies, anywhere from mid-September through October. On the west coast and warmer climes, you have a longer planting window, anytime till end November. I like Hallowe'en or around a full moon (September 17th/October 17th). For how to grow really great garlic, see here. Carrots, beets, lettuces, onions, all the other things - Don't save them all till fall, eat fresh from your garden every day! I've been eating a salad and roasting veggies from the garden almost daily since mid July and still have plenty left in the garden. ( have lost 11 lbs since June 3rd-just under 3 months, too : ) If you had a great onion crop, see here for how to cure them for storage. I did not as the maggots got near all of them before the alyssum grew around them for protection. What to do over the long weekend? This is a great time to sow short season crops that like to finish off in the cooler temps coming our way. They germinate quickly in the warm soil and then grow nicely in the cool weather. What to sow? radishes, lettuce, Asian greens (they love these fall temps), turnips, chard. I'm skipping this bit, I think, except the lettuce, and just sowing for spring. I'm just over it for this year, it has been an odd summer. Shop for your early spring vegetable seeds now. Sow just before the snow flies, mid-October here, mid-November or later in warmer zones (west coast). Carrots, lettuce, spinach, lettuce, radishes, parsnips, scallions, beets, chard. These will come up in late March or early April. Shop around for spring bulbs. Not sure whether I will be ordering from Vesey's, or trying to buy locally this year, as I just want a big swack of tulips this year. *Tip that I just learned today? I was today years old, a very old gardener, when I found out that when you feed your tulips/flower bulbs with bloodmeal (nitrogen!), you do not put it in the planting hole, but rather scratch it into the soil's surface after planting! Why did I not know this? Anyway, only apply if your soil is low in nitrogen. What more can I tell you... Oh, let me catch you up. The landscaper should be finished within a couple of days. I will then (finally!) be planting out my stash of shrubs and perennials that I have been saving for the new beds. I am so excited that the end is nigh, and still early enough in the season for us to enjoy the yard before snow flies. Pics to come very soon! And in the greenhouse... Melons are doing great. Should be eating them soon-ish! Cucumbers leaves starting to look yucky, but producing like mad. Tomatoes doing well, harvesting from the greenhouse. Peppers are finally near aphid free thanks to the ladybugs, and are making peppers. Eggplants look like they are a write off. The blossoms have maybe been too aphid filled to pollinate? I have tried to help them along with hand pollination but not one eggplant on 6 plants, even though lots of flowers, and healthy plants. Next year, they are going in pots! Bugs Not sure if I mentioned this last time, or if I have just talked about it on fb, but it is a very buggy year. It is also getting to be the end of the season. Please do not stress about these pests. The trees, flowers, shrubs will soon drop their leaves, finish blooming, be done for the year... is not worth it to try to get rid of one pest, only to kill off many of the good guys at the same time. My yard has bad bugs, but is literally full of ladybugs, bees, hoverflies (look like bees, do not sting), parasitic wasps right now. It is amazing to watch! Let them do their thing. Thrips are little bugs that are getting into your flowers - roses, dahlias, cosmos, zinnias, squash blossoms, petunias - making them look brownish, not opening well, streaky, twisted, looking sad. To find out if you have thrips, take a blossom, hold it over a white sheet of paper, give the flower a tap. If you see little bugs that look like tiny bottom eye lashes, you have them. Sadly, there is nothing that you can do about them. No contact sprays will kill them as they hide in the blossoms. If you want bees to feed from your flowers, you do not want that anyways. What can you do? Thrips comes through the yard in a wave. Remove ugly flowers, toss, let them rebloom. We still have lots of time. Or, leave them be and wait till the thrips are gone for new pretty flowers. Or, get rid of the plant... it is just about September. Aphids - well, here on the prairies, they have been so bad that they are making trees sticky, making cars parked underneath them sticky, getting into every single thing. Oddly enough, I do not have them anywhere else in the yard besides the greenhouse. Must be all that alyssum that I have everywhere, and I do mean everywhere. The beneficials love it. Please do not bother spraying. You will never get rid of them all, but you will diminish the good guy population at the same time. Guaranteed they are there. The ladybugs and their larvae are out in full force! The hoverflies, the wasps, the parasitoids, too. Let them have at it. I am pulling my eggplants this weekend, the ladybugs have thinned out the aphids enough that the peppers are fine. Phew! If you want to try something, pick up some ladybugs from the nursery. Otherwise, pull the plants, let things be for this season. It has been a tough growing year all the way around. Call uncle and walk away. One last thing... leafhoppers. I drown hundreds of them each week. If you start to spray your vines (virginia creeper, hops, grapes) and bunches of little white things fly out, you have leafhoppers. There is nothing much you can do about them now either, except spray them with water till they fall to the ground and then keep spraying them in the hopes that you are drowning some of them off. As you can see from my grapevine, I have had a terrible leaf hopper problem. They are finally leaving? Dying off? Seem to be almost gone. Ladybugs, lacewings, and other insects will eat these wee bugs though, so next year, I will be planting lots of alyssum and cosmos at the feet of these vines. You can also try Green Earth dormant oil spray kits in late fall and early spring, when the plants are dormant. Also on roses, cotoneaster, and fruit trees. Read directions for correct time to use. That is it in a nutshell. I shall spend the long weekend pulling out anything that is done, or not thriving. Filling up that green bin for garbage day. Eggplants will be in it! I will be also be baking zucchini breads for the freezer, plus some apple cinnamon buns made with apple butter. That recipe is coming in the Sunday Bits post. As I started with a picture of one of my mountain ash trees, thought I would end this post with the other one. This is my red berried one. Remember in spring how I said it was so full of flowers that I could hear it humming as I sat on the back deck? Those flowers all turned into berries! The cedar waxwings will be super happy when they come through this year! Isn't it beautiful? Happy Labour Day Weekend ~ Tanja
- Bits of This & That (New Year's Day)
The start of a brand new year. New dreams, hopes, and wishes all start today. I'm not sure what the new year will bring but sure am looking forward to all the new beginnings. New yard, new garden, (sort of) new town, new people to meet, new job of some sort, maybe? But on to the good stuff... I don't know about you guys, but as soon as the holiday is over, I start thinking, breathing, living gardening. I have so many ideas in my head right now about what to write about this month, I need to jot them all down so that I can share them with you. This is a great time to bring out your journal from last season, to make plans for the season ahead. What went well? What would you do different? Did you do all the things that you had put into your journal? If not, if you still like the ideas, just move them over to the new one! I always get so many ideas that I cannot possibly do them all in one year, so whatever I did not do or try, if I still think it is awesome, I make a point of moving it into the new journal. M y cone shaped strawberry baskets that were mixed with violas is an example of that. I had that idea pinned for about 5 years before I finally found the perfect baskets for them! Plan your colour scheme. This used to be one of my favourite things to do with my neighbour. We would get together to plan our planter and basket colour schemes for the season ahead. This helped me with my ordering from the local, bee safe flower supplier. I made sure to get lots of different hues of the colours we chose together, in spillers, fillers, and thrillers. I also ordered other colours, of course, but this gave me a good footing to start off on as there are overwhelming kinds and colours of basket stuffers! I often changed up my colour scheme just a little bit, according to what was left on the greenhouse floor when I finally started my baskets, but she was very focused on her hues. I think the best part was just the planning process though. What fun we had. Don't forget to keep feeding the birds! This is when they need you most of all, till things start to pop through in spring. Here is the recipe for my all natural, healthy, yummy birdseed wreath that all the birds love. This picture above is from Jared at the Vegetable Academy, a blogger and food grower in Saskatchewan. He has an amazing amount of growing information, is a You-tuber, too. I just wanted to show this great picture that he posted with the difference between Broccolini and Broccoli. I grow both, enjoy both, but prefer the broccolini, as I like the crunchy stems more than the florets. Okay, here are the fun gardening links that I found over the holidays that caught my eye! I'm so excited to get going on the new season ahead... even though January is really just for planning and dreaming. Watch this episode of Gardener's World for year round garden ideas from Stephanie Hafferty . She just moved to Wales less than 2 years ago, to a grassy patch, and has since turned it into an amazing food garden using no-dig practices. Want to know how to perennialize your broccoli? You need to watch this! Of course, we cannot do this here in our zone 3 gardens, but those of you on the west coast can absolutely do this! The show also gives you a how-to for making a really great bug hotel, a clematis wreath, and how to save your clematis from the dreaded clematis wilt. The top 12 highest yielding vegetables to grow this year. Save on your grocery bill and with the instability of the supply chain, grow your favourite foods to eat fresh, can, freeze, and dehydrate. All about the seed industry! Are you mystified by the terms hybrid, heirloom, and open-pollinated? Concerned about genetically modified seeds? Organic seeds versus inorganic, does it matter? Wondering what it all means and how (much) it concerns you and your garden? This is the best explanation I have ever read! it is an interesting read, not just facts thrown on a sheet. A must read : ) Still about that same article above ... I was often asked why I grew so many assorted varieties to sell each year (about 60), rather than sticking to a few varieties and growing lots of each kind. I'm thinking life would be pretty boring if we all just grew the same things all the time. There are so very many wonderful (heirloom and op) tomatoes out there that I want to grow. It is always an adventure to try a new kind to see how it fares in my climate, my yard, my weather. Tom Stearns, founder of Vermont-based High Mowing Organic Seeds, sells a mix of hybrids, heirlooms and modern OPs says “A tomato’s final flavor is 60 percent genetics, 40 percent environment.” That is why after 13 years of trialing different tomatoes in the zone 7 garden on the island, I was selling 80% tried and true varieties (tomatoes that did well for both me and my customers) and introduced about 20%, give or take, new ones each year. I grew each new tomato variety two years in a row to give it a fare kick at the can, unless it did really poorly, in which case I dumped it and moved on to something else/better. I now get to start this process over again in my new garden, my new zone. I will start with my absolute favourites, of course, add a few new ones, and see how it goes. How excited am I! I hope you all continue to trial new kinds without me, either from seed, or from small, local, organic growers selling an assortment of cool tomatoes, whether from their backyard or a wee greenhouse business. Btw, those are the best ones, you all ; ) To trial new seeds, check out your local Seedy Saturdays/Sundays. They will have local, small companies that sell seeds grown in your area, for your area, all op or heirloom. That seed house article above also mentions some seed companies worth checking out. Here is my list of suppliers that I tend to buy from. I will often buy one or two packets from a new (to me) company, to check them out, but they are not on my list as they vary from year to year. If you are on the island, there is a small seed company that sells their seeds through the Pomme Naturals store. Cannot remember the name but I sure love those seeds! Here are a whole bunch more ideas of organic American veggie seed companies to check out! This article for how to get kids interested in gardening, from toddler, to tween, and even teenagers. Here are some of the easiest crops to grow from seed , perfect for beginners. I am not sure that I agree with them about the peppers, as they can be a bit tricky, but all the rest are great. Most can be sown directly into the garden. Want to try different crops than the norm? Here are 6 veggies that you can try . I have tried most of them! While I grow mainly only what the family will eat to take best advantage of my garden space but I also like to trial new-to-me things as you never know when you will find a new favourite. Are you into self-sufficiency? Want to try some staple crops this year? Read here for a self sufficient garden plan with crops that are calorie rich, return high yields and store easily. Winter sowing native plants and winter sowing and growing. While this yard in this article is very different from the look that I strive for, there are so many practical ideas that intrigue me for today's changing landscape, like the rain garden, dry creek bed, gardens instead of front lawn, and the use of drought tolerant, easy plants that are favourites of butterflies, birds, and other wee critters. So many really good ideas in this article. Interesting item I found that is not gardening related... Have you heard of Cottagecore decorating? It is kind of granny style but also kind of the newer version of Farmhouse Style that works for all sorts of houses. This new house is not very farmhouse looking on the inside or the outside. If I were to do the stuff that I usually do, it would look a bit out of place in this house, so Cottagecore works really well for me. Is cottagey, flowery, rustic, and homey. Here is an article about how to get this look of cosiness and the feel of home baked bread in your home. Read the article about Cottagecore decor that you see in the picture above HERE. That is it for this week's Bits. Lots and lots of i nteresting stuff to poke through. There will be so much gardening stuff coming up over the next few weeks, my brain is on overload with ideas to tell you about... See You Soon... and hey, Happy New Year, eh ~ Tanja
- Welcoming The New Year
Sitting here on the day of the eve, wondering what is coming in the new year, looking forward to new adventures, friendships, and beginnings. On today's agenda is cleaning house, washing bedding, and doing laundry. Is considered bad luck to do this tomorrow, on new year's day or you risk bad luck, or worse. So, I am doing my part to keep the luck inside the house by starting the new year with fresh bedding and clean floors. Am I superstitious? Well, maybe a little bit, but mostly, I just really enjoy rituals and traditions. Here are some traditions that you might like to see the old year out and usher in the new. Chose any and all that suit(s) you! If nothing else, they are super fun. 1. Resolution - we all know this one! Are you making one? I am and have already started, it is a many fold one towards better health. Not a fan of resolutions? Here are some other new year's traditions that I think are lovely... and hey, who says you need to do just one thing? I do many of these! 2. Pick a word of the year. Just one word that sums up what you want the year ahead to look like and to be. You might choose mindfulness or intent, charity, or simplify, self-love, growth, or maybe grace or strength. Just one word that helps you set a goal or aim for your year. Mine is 'Believe'. To believe in myself, to believe that all will be well with the new start... or maybe it should be 'Courage' ; ) Both are good, strong, appropriate words. 3. Similar to picking a word is a New Year's Intention. A positive vision for the year ahead that is broader than a resolution. Resolutions are more specific while with an intention, you can set your vision with a moodboard for the year, or a mantra. Something like 'Let it go' or "Find joy in the everyday', or maybe 'See goodness around me'. What about 'Find beauty in your day', 'Be mindful' or 'Lead by example'. Going by my chosen word(s) above, I guess that would make my mantra 'Go forth with faith and courage'. 4. Burning Bowl Ritual. Or, maybe you prefer to shed yourself of the bad year to welcome in the new year? I like this one, it involves fire ; ) Write down on a slip of paper what you want to rid yourself of from the year 2022 and a wish for what you want the new year ahead to bring. Light a candle in a bowl, or gather around a firepit outdoors. As you watch the paper burn, visualize your unwanted thoughts rising up in the smoke, being released from you. Allow yourself to experience whatever you are feeling: fear, anxiety, sadness, loss, gratitude, and let those feelings lift as the slip burns. I did this last year and will be doing it again this evening. Last year, my slips were short so burnt quickly, so this year I will make them longer to make it more lasting and satisfying ; ) 5. Smudging the house - Cleanse the house of all energy to create a new and welcoming environment for the new year. I have several smudges that I can use but have decided to use the one you see in the picture above that was locally made with cedar, lemon balm, sage, and lavender to purify, connect, cleanse, and heal, plus mint for happiness. Sounds like the perfect combination for tonight. Some say to open the windows as you do this to allow the energy to escape, which kind of fits in with one of the other traditions you can read about below. You can say a mantra at the same time, if you wish. Am I a bit hippy dippy and crazy? Yep, maybe a bit ; ) 6. Lighting a candle - there are many traditions that revolve around lighting candles on the eve, depending on your religion or culture. In my family, we always light a candle to remember and honour deceased family members. We use a nice, big candle that will burn for many hours, or even days. Here are some more fun ideas that you might want to incorporate into your new year's eve.... Open all the doors and windows to let the old year out of the house allowing the new year to enter unimpeded. Some people say you should wear red underwear to find love or yellow to increase your wealth. After midnight, grab your luggage and take it for a stroll around the block for more chances to travel in the new year. Sweep the bad energy out of your house. Make sure to clean the floors, the shelves, and the closets before midnight on New Year's Eve. Eat 12 grapes, one for every month of the year, eat them for good luck as the clock counts down to midnight. Wear polka dots for good luck in the new year. Kiss a loved one. They say that the first person you come into contact with in the new year dictates your destiny. See below for something similar. Hang bundles of onions at your front door to invite personal growth and rebirth in the New Year. According to Greek tradition the first person to enter a house on New Year’s Day brings either good luck or bad luck to the household. After this special guest is chosen, the home owners need to step on something made out of iron so that the family will be as strong as iron throughout the new year. The Irish bang bread on the walls of their homes to chase any bad spirits out of the home and start the new year off with a clean slate. I didn't used to do much to welcome in the new year but starting doing several of these things because of the pandemic. I really felt that all that bad luck and energy had to leave the house so that I could start afresh in the new year. It might not do anything but it sure makes me feel better, and that is the main thing. I won't be up at midnight as I am too old and tired for that, but the new year will be welcomed with a little bit of retrospection, a clean house (just in case), and a whole lot of hope for what is yet to come. Whatever you do, even if nothing at all, I wish you much health, happiness, and prosperity in 2023 ~ Tanja
- Finnish Gingerbread Cookies
These gingerbread cookies are a Christmas tradition at our house. I remember making them with mom and my siblings when we were just teeny tiny. Mom must have had the patience of a saint to bake with all three of us. We lived in Sault Ste Marie when I was little, where half the population was Finnish (the other half Italian) back in the 60's and 70's. Probably still is. This meant that the month of December was full of yuletide festivities and visiting from house to house. If you visit any Finnish (or Scandinavian) household for coffee, there is always a plate of cookies and cake offered with coffee. So, we made about 400 of these gingerbread cookies each year to get through the holidays. My sister and I were assigned tasks to make the baking evening to go quickly and efficiently. As the eldest, I was entrusted with taking them out of the oven and putting them outside on the doorstep to cool faster so that we could keep the cookie sheets in action. The snow on the doorstep melted under those pans and turned into a sheet of ice after cookie baking day! Nowadays, is just hubby and I making them together, while I reminisce (yet again) about my childhood. Hubby just nods, he has heard it all before ; ) This recipe makes a whole lot of cookies so is perfect for a cookie exchange, or you may want to half the recipe. Makes about 125 cookies. Is chilled over night so make the dough the day before you need them. 400 gr sugar 1 cup golden syrup ( We use Roger's) 1 cup water 1 tbsp cloves 1 tbsp cinnamon 1 tbsp ginger 1 tbsp dried, ground orange or lemon peel. Not candied peel. If you cannot find this at the deli, you can grate some fresh orange peel into the recipe instead. 2 tsp baking soda 1 kg flour Put the water, sugar, syrup, and orange peel into a pot. Bring to a boil and let cool. Mix together the remaining ingredients. The recipe says to melt the baking soda in just a wee titch of water and add at the end with the water mix but we just add it to the dry ingredients and have not noticed any difference. Mix all the ingredients together until the dough is well blended and firm. It will be wet and sticky but not runny. Place in a bowl, cover top with cling wrap, chill in the fridge overnight or for at least 12 hours. Cut the dough into 2 or 3 manageable chunks. It will be very firm. Lightly flour the counter. Roll out thin, to about 1/8th of an inch. Add a small hole in the corner with a straw if you want to string them on the tree, or the mantle. Place on greased cookie sheet and bake at 375°F for about 10 minutes, or till the edges begin to get a hint of brown. Place in an air tight container or into bags so they stay nice and chewy throughout the season. If they are open to the air, they become crunchy, which is great for decorating but not as yummy tasting! Though perfect for dipping. These are truly amazing tasting gingerbread cookies. I hope you give them a try. Yuletide Greetings from our house to yours ~ Tanja
- Beautiful and All Natural Birdseed Wreaths.
Easy to make birdseed wreaths with all natural ingredients that birds love. As soon as November hits, I get into wreath making mode… evergreen wreaths for the door and the shop, yummy seedy ones for the birds. These lovely birdseed wreaths are easy to make, great for gift giving, and oh so festive for the holidays. When I first started making wreaths for the birds, I trialed three recipes to see which ones the birds would like the very best. Two of the wreaths were made with suet and other natural ingredients, and one was that yucky one that keeps making it’s rounds on the internet, the one made with flour, gelatin, and corn syrup. To be fair, they all attracted birds, even that one that I do not like, but as I cannot in good conscience feed my birds corn syrup and white flour, I stick to the two suet wreaths. For all three recipes, see HERE! You decide which one you want to make : ) I have now been making these wreaths 10 years (boy, has that ever gone fast!). I've made all sizes, tried different things, and learned a few things along the way, too. This is the recipe for the wreath that I make most often, the one I mostly sell at the greenhouse. It has only four ingredients… suet, peanut butter, cornmeal, and a really good quality of wild birdseed, suitable for the birds in my area. What you need to know about these ingredients… Suet - If you buy the small bags of suet from the frozen meats section of the grocery store, you will get about 3 cups of nice, white, clean suet, with no bits of meat in it. It is ground up, so melts quickly and is super easy to use. This pre-rendered suet is dehydrated, so use a bit more than the recipe calls for to make a nice, fatty wreath that the birds love. The birds love suet! If you cannot find any (there has been a shortage the past two winters) get your suet straight from the butcher, ask him to grind it for you first to make easier to work with. To use this suet, you will need to render it before making it into a wreath, meaning that you melt it down slowly and then strain it to remove all the bits of meat from it. If you get your suet in a big chunk, chop it up nice and fine before you render it, so it melts faster, and you get more of the fat out of it. You want to melt it on a really low heat, for a really long time, to keep it from scorching. The slower you go, the clearer the fat will be. This is less important for the birds than it is if you are using it to make your Christmas pudding ; ) If this really grosses you out (as a vegetarian, I hear ya), pick up some lard instead : ) Peanut Butter - You can use chunky or smooth, both work just fine. Make sure that you use a peanut butter that does not have xylitol (also sometimes called Birch Sugar) in it, as it is not good for birds and is deadly for your pups. Dogs love birdseed wreaths as much as the birds do, all that lard and peanut butter ; ) Cornmeal - If you have no cornmeal, or prefer not to use it, replace it with small flake oats, or steel cut oats. Birdseed - I use a birdseed that consists mostly of black oil sunflower seeds, which is loved by birds everywhere. I recommend going to a bird store to find the blends most liked by the birds in your area. The best seeds, the ones most liked by the birds, are sunflower, nyjer, safflower, peanuts, and then white millet. If you use the seed blends that are low in sunflowers, but high in white millet and corn, it might appeal to rodents more than birds. Eek! Also, millet is tossed to the ground for the ground pecking birds to eat, so you may end up with weeds sprouting in spring. The Recipe... 1 cup of suet (1.5 cups if using the bagged suet) 1 cup of peanut butter 1 cup of cornmeal 4 cups of high-quality birdseed Melt your suet in a large pot at a low heat. Add the peanut butter, stir till it is all melted. Add the seeds and cornmeal, stir till well coated so that it sets well. Put the mix into a bundt pan to make it look fancy. Let harden in pan overnight, can also be placed into the fridge or freezer to set up faster. Extra information to keep your wreath from breaking in half... When I was making these wreaths, I discovered that sometimes, after much love and attention from the birds, they would crack in two at the weak point. The birds like to start pecking at the top, by the ribbon, and then work their way down. As the side narrowed and weakened, it eventually broke and fell to the ground. When a wreath falls at my house, the evidence is quickly gobbled up by my two garden helpers, they love anything with peanut butter... and then, bespeckled remains would grace the yard... I had to come up with an organic strategy to ensure the wreaths stayed together for the birds to enjoy, not my pups. After some googling, I found an idea to use a wire bent into a wreath shape. I knew I did not want to go that route, not practical for me to be bending many rings of wire. I then came upon one that was using bits of twigs tied together with florist's wire … decided to use that idea but modified to use no wires. I gathered some grapevines from the garden and twisted them together, making these wee little grapevine rings. No need for wire or string, just use pliable branches that you can twist together. They do not have to be grapevines, just any branches that are thin and bendable. I have used branches from all sorts of shrubs over the years. Make a ring to the size you want, hold it together with your hand while you weave the ends in through the center of the ring, go round and round as many times as you can so that it stays together. Put some birdseed mix in the bottom of the pan, add one or two of these rings into the cake pan, stuff the warm seed mixture all around them, top up with the rest of the mix… voila! Works like a hot dang. The rings are then totally biodegradable, no wires used at all. After the wreath has set up, hang it from a branch, a shepherd's hook, or on a fence. Mine are hung up against a really, really big cedar tree. Here you can see a bit of the bent grapevines showing, but it does not detract from the wreath at all... looks very natural : ) You can also use a mini bundt pan to make wee little wreaths that are so super cute! The recipe makes 6 small ones or one medium sized wreath. To make them extra special, you can add a ‘special frosting’ of suet and peanuts. Put the roasted unsalted peanuts at the bottom of the pan, add suet to hold them together and create the look of white frosting, fill the pan as usual. Birds love this extra touch. Make whatever size you like, add a bit more or less of any ingredients that you like. You can add extra suet to the bottom for a special treat even if you do not have, or prefer not to use, peanuts. Suet and seed frosting on this one. Roasted unsalted peanuts on this one, with just enough suet to hold them in place. I hope you enjoy making these as much as I do. Love feeding the birds for the holiday, and in the new year, too. Happy Holidays ~ Tanja
- Birdseed Wreaths - They're for the Birds! Part 1
I have now been making these birdseed wreaths for 10 years, have made hundreds since then, but here is the post from trial, where it all began, when I first started making them. I had always wanted to make birdseed wreaths, but never really had a great place to put them.... Here at the new house, we have several mature trees that are great for the birds in all ways, offering food, shelter, and a hanging spot for feeders/wreaths. We also have a lot of fence line, should want to hang some there. So, I started looking for birdseed wreath recipes online - there are quite a few, it turns out! I knew that I did not want to do the peanut butter rolls, where you simply smear the peanut butter on a wreathe form and then roll it in seeds. I wanted something healthy, organic, and natural. Here are the three I chose to make and trial with the birds. VERSION #1 1/2 cup of warm water 1 package of gelatin 3/4 cups of flour 3 Tbsp corn syrup 4 cups of birdseed Mix and heat the water, syrup, and gelatin in a small saucepan. Add the flour to the pan and mix. Will be very thick. This is the 'glue' that holds the seeds together. Add your seeds and incorporate the 'glue' into all of the seed. Mix well as the flour will tend to goop up. Push into the bundt pan and let set overnight. (The instructions said to use an oil spray in the pan to help loosen it, but again, I am not sure how good this is for the birds, nor do I have any of this spray stuff at home, so I did not do anything to the pan first.) To loosen the wreathe from the pan, I simply ran the bottom of the pan under warm water for a bit. Worked like a charm. My thoughts - This one holds together the best of them all, but the ingredients leave me shaking my head. Seems like 'junk food' for the birds. The flour and syrup are used to create the 'glue' that holds the seeds together. Everything I read seems to indicate that both items are safe for the birds, though not necessarily the most nutritious. I deleted any items that I thought or read about that might possibly be dangerous in any way. *Added later note - I never made this wreath again. VERSION #2 1 cup cornmeal 1 cup suet 1 cup peanut butter 4 cups birdseed Slowly render the suet (heat it to melt it) Add the peanut butter to melt it into the suet. Add seeds and cornmeal, mix well. Push into the bundt pan and let sit overnight. Remove as above. This one stayed together nicely, is firm and looks prettiest colour wise. The peanut butter gives it a nice warm colour) The suet seemed to settle into the bottom of the pan though and you see that on top of the wreathe when taken out of the form. I wonder if I should have mixed longer, or if it simply was extra and so settled at the bottom? *Added note - This recipe is the one that I use the most often. I have literally made over a hundred of these to gift and sell over the past nine years. The settling does not happen if you stir well. Though the birds do not mind extra suet. I used this idea later and came up with a way to use this settling to make 'icing' on the 'bundt cake wreath'. For this one I used the Martha Stewart recipe on Pinterest.... and a larger bundt pan. VERSION #3 Suet (rendered) Dried and fresh cranberries 6 cups birdseed 1 cup nuts Note: please use unsalted ROASTED peanuts , not raw, which may in fact be harmful to the birds. If you only have raw, roast in the oven for about 15 minutes. Melt the suet slowly. Add nuts, birdseed and cranberries (if using) to the suet. Mix well. Let harden in pan, overnight, in fridge or freezer. I love the look of this one, is very natural looking with the seeds all shiny and glossy from the suet. However, I find that the sides crumbled a bit as I added the ribbon and hang it up, so it is a big fragile to work with. Am not sure how well it will hold up to the birds and the weather... *Note - I make this one often and just add a bit more suet or peanut butter to keep it from crumbling on the edges. The real test will be to see which one the birds like the best! Please stay tuned .... For Part 2 - Want to know how the three wreaths made out with the birds? Please see the link HERE! For and update on how to make your wreath sturdier, less apt to crack in half, please see HERE! Thanks for Reading - Happy Wreath Making ~ Tanja
- Homemade Cough & Cold Remedy
Cough, cold, and flu season is once again upon us, so here is a recap of my all time favourite, organic, homemade cough and cold fighting syrup. It also works well as a preventative as it boosts your immunity. This yummy flu brew is my go-to remedy whenever the throat begins to tickle or the chest feels heavy. I make loads each winter to share with family and friends, plus give as gifts. It is super simple to make, tastes yummy, is completely organic. What you need to make your homemade Cough & Cold Remedy? Organic lemons - Homegrown or organic as you will be adding the peel, too. Ginger root - Just a small knob will do you! Honey - I am blessed to have a terrific local honey farm just a few minutes down the road. Support local, if you can. How-to make your own Cough & Cold Remedy... I use one half to one whole lemon per jar. Scrub the lemon well, and slice into thin wedges, quarters, slices, anything you like. I tend to use really thin half slices or thicker wedges that I quarter. Remove seeds and any tough, pithy bits. Peel the knob of ginger and slice into small discs. I like to slice the disks into slivers so that you are sure to get a bit in each cuppa. Use as much or as little as you like. I am not a huge fan of the taste of ginger so I use less, however, I have found that the zing nicely mellows as it sits, so if you are a fan, use more. Place a few layers of lemons into the washed and sterilised jars. Toss on a few pieces of ginger, and repeat till full. Cover with honey, letting it ooze into all the crevices. Let sit and settle for a few minutes and then top up with more honey, covering all the lemon and ginger slices. Refrigerate. The juices from the lemons will set tle on top while it sits, so give a good stir before you scoop out a spoonful of goodness for your cup.... or dig through the layers and grab a bit of everything on your way. Add a spoonful to your cuppa tea or into a cup of hot water. It tastes terrific both ways! Why this works... Ginger helps to control and calm the symptoms that come with colds, flu's, upper respiratory tract infections, and bronchitis. It also helps to reduce muscle pain, and settle the tummy if one has nausea or vomiting. Lemon aids in controlling fever and chills as well as adding that much needed boost of vitamin C to soothe your sore throat. It has anti-septic properties and also gives one a boost when feeling fatigued. If taken before you get sick, it helps to build up your defence system and prevent flues, colds and inflammation. Honey has natural anti-septic and anti-bacterial properties so helps to boost immunity to fend off colds, coughs and flues, plus aides in the healing and soothing of symptoms if you do get sick. It is also a soothing cough suppressant. You will not be keeping these in the pantry so can use any pretty jars that you like. I found a set of 6 of these jars at my local dollar store. Good health, Good luck, & Happiness, For Today and Every Day (An Irish Saying) ~ Tanja
- My 2023 Tomato Grow List
This is my tomato grow list for this year. Some are seeds that I had already, like all of the Baker Creek seeds and the Heinz from Yonder Hill Farm. How do I chose what goes on my grow list? I like to make sure that I have ripe tomatoes throughout the entire summer by ordering early, mid, and late season varieties. Sometimes they are listed by season but most often, the seed sellers tell you how many days till maturity. The shorter your season, the earlier your dates should be. The only issue with ordering just early birds is that they rarely have that deep, rich, tomato flavour that we dream about all winter long. They need heat for that to develop, so order from all seasons. I also order both determinate and indeterminate types for a constant supply from early summer to late. Determinates put on all their flowers at the same time so the tomatoes are all ready to pick over a two to three week period of time, and then they are done for the year. You cannot get determinates to produce more flowers or fruits throughout the season as they have a determined life span. This make them perfect for canning so one can get them all done in a couple of busy canning days. Indeterminates continue to flower and fruit till the weather takes them down. I top them (nip off the tops of the main leaders) in mid to late August so they stop producing more flowers and instead finish ripening the tomatoes already on the vines. The determinate mid-season paste tomatoes on my list are for canning, a must have to fill the pantry and maybe the freezer, as well. I need a whole lot of food in my store room next winter. Use paste tomatoes or canning tomatoes for processing as they are meaty, have less juice and pulp. Yes, I absolutely still use other tomatoes if I have a glut of them, they work just fine, just take longer to cook down. The indeterminate late paste tomatoes are even meatier and less pulpy than the determinate ones are but they produce fruits and flowers all season long rather than all at once. Therefore, unless one has room to grow a bunch of them, it will take time till you have enough harvest to can. We use these for fresh eating, salads, fresh and canned salsas, bruschetta. The two early determinates are for fresh eating tomatoes in early summer, to keep us going till the array of mid seasons are ready. I have a whole lot of late tomatoes on my grow list again this year, which is dicey in my new climate. Most of these seeds, I had left over from last year, so I am going to grow them and see how they do. Beefsteaks have always been my most favourite type to grow. They make me happy. The others I grow for practicality but there is no better feeling than growing great big, juicy whoppers! The two late storage tomatoes (Mystery Keeper and Red Fig) are for fresh eating in winter. Isn't that mind blowing? The lates will be grown in the greenhouse or under shelter to extend the season. My fancy, heated She-She/Garden House will not be finished until mid to late summer so unless they are growing in a pot, it will not be of much help. Elizabeth Red, Ind, Paste Early Season - 60 days T&T Seeds Heinz 2653 Red, Det, Paste Mid Season - 73 days Yonder Hill Farm Martino's Roma Red, Det, Paste Mid Season - 70 days Baker Creek Seeds San Marzano Redorta Red, Ind, Paste Late Season - 78 days TomatoFest Tondino Di Monduria Red, Semi-Det, Paste Late Season - 80 days TomatoFest Black Prince Black, Ind, Slicer Mid Season - 70 days ? Bloody Butcher Red, Ind, Slicer Early Season - 54 days TomatoFest Dw. Hannah Prize Red, Tree, Slicer Mid Season - 75 days TomatoFest Dw. Purple Heart Purple, Tree, Slicer Mid Season - 75 days TomatoFest Early Annie Red, Det, Slicer Early Season - 60 days Heritage Harvest Mystery Keeper (storage) Red, Ind, Slicer Late Season - 80 days Heritage Harvest Gardener's Sweetheart Red, Ind, Cherry Mid Season - 70 days Heritage Harvest Lucky Tiger Bi-Colour, Ind, Cherry Mid Season - 70 days ? Red Fig (storage) Red, Ind, Cherry Late - 85 days Heritage Harvest Ananas Noir Bi-Colour, Ind, Beef Late Season - 80 days Heritage Harvest Aunt Ginny's Purple Pink, Ind, Beefsteak Late Season - 80 days TomatoFest Aunt Ruby's Green Green, Ind, Beefsteak Late Season - 80 days Baker Creek Seeds Chianti Rose Pink, Ind, Beefsteak Late Season - 79 days TomatoFest Oxheart Red, Ind, Beefsteak Late Season - 80 days Heritage Harvest Paul Robeson Black, Ind, Beefsteak Late Season - 85 days Baker Creek Pink Berkeley Tie-Dye Bi-Colour, Ind, Beef Mid Season - 65 days Baker Creek A bit of information about the varieties I chose. (the ones in yellow on the chart are seeds that I do not yet have ordered). The Elizabeth paste tomato is a new one for me but as soon as I read about it, I had to have it. It makes loads of small, meaty tomatoes on vines that can grow up to 10 feet tall! I mean, I just have to try this one! And it is early, starts fruiting at just 60 days. Sounds like a winner. Will let you know how she does. Heinz and Martino are for canning. They will be ready in early August so that we can do up a bunch of jars of sauce and diced tomatoes. At the acreage, I used to grow 80 plants for canning but only have room for about 35 plants in total at the new house. Therefore, I am hoping to put some out at my brother's farm. He does not yet have the beds and works long days so will see if we can get in the beds in spring. Tondino di Monduria is an Italian paste tomato that is grown with little to no irrigation, is drought tolerant. Growing with less water makes for a richer, deeper, tomato flavour so that is a win and I am all about being thrifty with water. The tree-form tomatoes are from the Dwarf Tomato Project by Craig LeHoullier. They are essentially short stocky indeterminate vines, very thick and sturdy like tree trunks. Instead of growing to 8 feet tall, they only grow 3 to 5 feet tall, depending on the variety. These tomatoes are all open-pollinated, not hybrids. I have been growing them for the past 5 years or so, and these two on my list are my favourites. I also like Uluru Ochre but decided to stick with my trusty Ananas Noir this year instead. Both are bi-colours with a similar taste and colour profile. I already mentioned the storage tomatoes a bit above. The Mystery Keepers are picked in late summer, popped on a beer flat and stored in a cool pantry/store room for homegrown tomatoes till Easter. The Red Fig vines will be hung on a nail or hook in the store room to be be picked as needed. Might get a bit wrinkly but will still be yummy tasting, and organic. Better than anything at the shops. I have a bunch of beefsteak tomatoes on the roster. I've been growing Chianti Rose well over a decade now. It puts out a bunch of big, pink tomatoes that everyone loves. I, personally, prefer the green and the black ones as they are richer and sweeter tasting. I always say that the black/purple tomatoes are like a dark roast coffee, just have a bit deeper, richer flavour than the others. Pink Berkeley Tie-Dye is just a total winner; produces earlier, makes big, tasty, juicy tomatoes, has won a great many taste tests all around the world, and was a best seller at my wee greenhouse. So, those are the tomatoes on my grow list for 2023. I am excited to start growing in my new yard, to see where the microclimates are, to grow in my new greenhouse, and watch the garden cottage go up. Lots to look forward to this spring. I hope this list helps you make your own 2023 tomato list, whether you buy the seeds or the plants. The rest of my garden veggies and flowers are coming very soon, plus tons of garden planning information for new and established gardens. January is for planning and dreaming! Happy 2023~ Tanja
- My Favourite Seed Sources for the Home Gardener
I have always purchased a whole lot of seeds annually, like I mean, a crazy lot! Some were for my own potager, of course, while the majority were for the greenhouse to start and sell to you as plants in spring. Now that I no longer have that wonderful wee greenhouse, I have been getting a lot of questions about where I source my seeds from so that you can grow your own next year, especially the heirloom and open-pollinated tomatoes. I have a real love affair with heirlooms, I like that there is a backstory to how they came to be, that someone loved it enough to save it and carry it on for generation. Some of the new open-pollinated types will become the heirlooms of tomorrow, they are that good! You can save the seeds from any heirloom or open-pollinated plant growing in your garden and you will get the exact same vegetable next year. If you were to take seeds from a hybrid, you will get some version of the parentage that went into hybridizing that veggie, but it will not be true to what you grew this year. If you are into self-sustainability and seed saving, leave the hybrids off your shopping list. I love to shop around and support all sorts of different seed houses, especially the smaller mom and pop ones, but shipping costs can add up really fast. It is pricey to shop around. If you want to order from several seed houses, maybe look into ordering with a group of friends? If you are in the Innisfail area, I would love to get together with you, we can become 'garden groupies'! One more thing of note when buying seeds in person, or online - always check to see how many seeds you are getting for the price that you are paying. Some send 10 seeds for the same price that others charge for 25 seeds (and no, in most cases, their seeds are not superior). Also, the seeds may cost more if it is brand new to (their) market, if organically and sustainably grown, or when being grown and sold by a small independent mom and pop company. You choose what you want to pay more for, if anything. Sometimes I will just pay whatever it costs as I really want it, while other times I decide that my mainstay is fine, I will wait till it goes down in price or find it elsewhere. Here are the Seed Houses that I buy from and what I tend to buy from them. Renee's Garden Seeds - has been my go-to for over 20 years, for both veggies and flowers. I love the packaging with the pretty pictures, and the seeds are of superb quality. I always have had the fastest and best germination from their seeds. The price point is really good, and you get a decent number of seeds per package. Flowers - Their mixed colour selections are superb, so well thought out and many combos to choose from. I especially love their zinnias. Where most seed houses give you one mixed colour choice (always with yellow in it, urgh) or just one single colour per package, at Renee's you have a wide selection of both colours and combos to choose from. From here, I would buy everything but if I had to choose just a few, it would be the alyssum, zinnias, and nasturtiums. They also carry Gem marigolds. Veggies - Again, I have been growing them for years and years, all are great, but here are some of my favourite Renee's veggies. Cucumbers - Best cucumbers ever! Green Fingers, Chelsea Prize, Tasty Green, Bush Cucumbers, and Endeavor are the ones I grow annually. Yes, I grow all of them! Melons/Watermelons - I have always had really great success with all of them, love the wee little watermelons. They are all really good so I cannot give you a favourite. They have a great array to choose from in carrots, lettuces, and I love the mesclun mixes. Oh, and the purple cauliflower is so pretty, tasty, and I find it less fussy to grow than white. T&T Seeds - Manitoba, Canada What I love most about this seed source is that they take shipping costs into consideration. I spend a lot on shipping, so I really appreciate a good deal. You can order up to 10 regular sized packages of flowers or veggies for just $5 in shipping (within Canada). You really cannot go wrong with prices like that. If you want more than 10 packages, I would just put in two orders; ) Flowers - If you are looking for exotic new varieties, you will not find many to choose from here, but they carry a great selection of the garden workhorses, the ones that feed the bees and attract the pollinators. They offer a great price point, and there are some real gems to be found. Gem Marigolds - Speaking of gems, these are one of the very best flowers you can grow in your vegetable garden to for the pollinators and other beneficial insects. The flowers come in yellow, red, and orange. When I could get my hands on these guys, I put them in the pollinator packs that I sold you each spring. White Swan Marigold - tall lovely creamy white marigolds with a light marshmallow scent. I sold many flats of these at the ngp annually, they are that amazing! Nasturtiums - They have the new compact Baby Rose and a stunning one called Black Velvet that is to die for. So pretty. I would put that one in baskets. Sunflowers - Strawberry Blonde, a lovely pale pink one. Vegetables - A good selection to choose from in most all the categories, here are a few of my favourites. Beets - I like every single one but my favourites are Chioggia and Cylindrical. The cylindrical ones are great for pickling in slices. Carrots - a whole lot of great ones! Red Atomic, Danvers, Healthmaster. The Rainbow mix is my favourite (as it has no white ones, I am not a fan of the white carrots). Cucumbers - So many pickling types to choose from! All amazing. Tomatoes - Rapunzel. This is a very cool open-pollinated cherry that I'd like to trial. Floret Flower Farm - Skagit Valley, USA. This beautiful flower farm grows their own seeds, they are organically grown, come direct from the source, and they have a stunning selection. You cannot go wrong with any of the choices. The hardest part will be getting your hands of some of their seeds, as they sell out quickly. Stems Flower Farm - Ontario, Canada Known for their flowers, of course, but they also have a wee bit of most every vegetable so you can buy both veggies and specialty flowers all at one source to save on shipping. The very best thing? They sell mixed variety packs of nearly every herb and veggie you would want to grow and don't charge extra for making a mix! You get a bunch of varieties in one package, so you save money and have a great blend with different maturity dates for an extended harvest season. Some of the veggies that they sell a variety of... Eggplant mix, pickling cucumber mix, cucumber mix, sweet pepper, hot pepper, summer squash, winter squash, kale, lettuce mixes of many sorts, paste tomato (for canners!), cherry tomato, slicing tomato mix.... Honestly, you really need to check out all the great veggies and variety packs they sell. Flowers - A beautiful, huge selection of hard to find, unique varieties. The amaranth varieties! The zinnias, cosmos, phlox, and snapdragons! I can go crazy with the shopping at Stems. Vesey's Seeds - This is the link to the Canadian shop but if you are from the States, just click at the top where the Canadian flag is, and the America shop will pop up for you. The shipping rates are reasonable (for Canada Post). I mostly buy perennials and flower bulbs from Vesey's, they have great lilies, grape hyacinths, gladiolas, and just about everything else. They also have a sales section at the back of their catalogue, if you get it shipped to you, where they have plants of all sorts for $5 and $10. Flowers - Just this spring, I saw a picture someone sent in of the petunias they grew from seed, especially the climbing ones! Wow! Veggies - They have a really decent selection in all the veggie types. You could probably order just about everything you need from this one company, they have it all. Lots of tomatoes to choose from, some hybrids, some heirlooms, and some of the new, cool, open-pollinated ones. Their onion selection is really good, with several types of shallots t o choose from, as well. I am big on growing onions, all sizes, shapes, and colours. Make sure to grow at least one type that is a good storage onion, not all of them are. Tomatoes... The two that I buy the majority of my tomato seeds from are Heritage Harvest Seeds in Canada, and Baker Creek Heirloom Seeds in the USA. Both have an extensive list of heirloom and open pollinated seeds to choose from, for flowers and veggies. I buy all sorts of veggies and flowers from both of these companies. Baker Creek is charging a flat rate of $12 USD for shipping to Canada (free in the States) so the more you get from them, the more worth your while it is. Hence the group purchase, if you can. Heritage Harvest offers free shipping on orders over $300 CDN but even though I order a swack of seeds, I have never made it to that dollar value. Mostly because I like to order a great variety so have to spread it around, so I just pay whatever it is because the seeds are worth it. I probably order 80% of my tomato, pepper, and eggplant seeds from these two companies, plus odds and sods. The quality is exceptional, the seeds have great germination rates, and you get a decent number of seeds per package. Heritage Harvest has great peppers and eggplants, too. Baker Creek carries many of the new open-pollinated tomatoes from Brad at Wild Boar Farms, like the Pink Berkeley Tie Dye, Brad's Atomic Grape, etc... or you can go straight to Wild Boar Farms and order direct. I have often done that, as well. They have super decent shipping rates so go crazy! I buy my favourite paste tomato here, as well, Martino's Roma. Here is my Top Ten Tomatoes of 2021 (the heat dome year) if you want to look back on it to see some of my favourites. On that old blog, you can go to any October for the past 10 years and check out the favourites for that year, and why they made the list. I cannot mention where I buy each of the tomatoes on my lists, as there are way too many but will tell you what I tend to buy from each of the suppliers. Added note - The two storage tomatoes that I buy (you pick them when they are pink, just before frost comes, put them in a cool place, and you will have homegrown tomatoes till Easter time) are Mystery Keeper from Heritage Harvest and Long Keeper from Tomato Fest. Tomato Fest is another great source, with a great variety to choose from. It is also a great resource, just about anything you want to know about tomatoes, you will find on their website. You can easily buy all your tomatoes from this source, they carry just about everything. This is where I buy the seeds from The Dwarf Tomato Project . My favourites to date, are Hannah's Prize, Purple Heart, Saucy Mary, Dwarf Audrey's Love, Tasmanian Chocolate, and Uluru Ocher. I also buy many of my cherry types from here, early determinates, and some of the pastes for canning. Yonder Hill Farm - a small seed house in Nova Scotia that I buy some staple tomatoes from that I cannot get anywhere else. This is where I get Heinz 2653, Glacier, and White Cherry (I had a few customers who absolutely love this pale-yellow cherry tomato and come back for it year after year) and sometimes also Black Plum, Sweet Tumbler, Tiger Mix, and Black Prince. The shipping was $5 for seeds but has now gone up to $6, very affordable. Adaptive Seeds - is another small supplier that carries some of my must grow tomatoes but is from the States. This is where I get Ropreco (hard to come by anywhere else), Sasha's Altai, and Gardener's Sweetheart. The shipping cost to Canada is killer so I order as many packages as I can to get right under that minimum dollar amount as I can, so will often throw in something new to try at the same time, like 'Dancing With Smurfs'. They also have a lovely selection of Amaranth. Artisan Seeds - They sell the unique new varieties of open-pollinated seeds, like the different Bumblebees (Pink, Purple, Sunrise) and Tigers, plus Marzano's Fire but it looks like they are currently not selling to Canada, sadly. You can always email and ask, never hurts, (I have done that before). The website is a bit of a mess, but they have some fun varieties and are totally worth checking out. Victory Seeds - Also a small American seed house with some really great varieties. The shipping is pretty costly. They carry the Dwarf Tomato Project seeds that I mentioned above, and also Heidi, Oroma, Glacier, Gill's All-Purpose. Their website is super easy to shop as they break down into early, midseason, late, and into all the colours, or you can shop by determinate or indeterminate. They carry all sorts of other heirloom veggies, too, like Ping Tung eggplants, one of my favourites. Renee's Garden Seeds - I usually only get one tomato from here, Chianti Rose, though I buy almost everything else from them. Chianti Rose is a large pink coloured beefsteak type tomato that I have been growing for 2 decades and selling for at least 1. They have mixed packages of heirloom types, plus some of the favourites, as well, so you can certainly order all of your tomatoes from this one source. Renee's seeds are of superb quality, highly recommended. Peppers Peppers - are you into growing the super-hot or the super unique? Check out the Pepper Merchant from Ontario. Or, I have ordered from this American company quite a few times, check out Pepper Joe's . Joe sells only a few sweet varieties but has almost every sort of mild to super stinking crazy hot pepper you can possibly imagine. He also gives growing advice. I buy most of my sweet peppers (and eggplants) from Heritage Harvest Seeds , in Manitoba but will pick up one or two from the others, if they have something that catches my eye. I am always on the lookout for small, tasty eggplants, as well. Eggplants have pretty much exactly the same growing needs as peppers, so I often lump them together. Wildrose Heritage Seed Company has a great selection of both sweet and hot peppers. They sell most all of the ones (hot and sweet) that were the best sellers at my greenhouse, plus have the elusive Thai Dragon, as well. Other.... Stokes Seeds - I very seldom order from here but often use it as a resource guide, or did when I was starting out the greenhouse, growing lots of new things. Want to know how to successfully start snapdragons or pansies? Yep, go here. They are a grower's seed supplier, have all sorts of things, but if you are new to starting seeds, or want to try growing something new, this is a great site to check out. They give you the dates, timing, heat, all the tips on how to grow just about everything. Wildrose Heritage Seed Company - Lethbridge, Alberta This little company has a good selection of veggies, especially love their pepper selection, as mentioned above. I have grown nearly all of the sweets over the years, all have done exceptionally well. I especially recommend King of the North, Orange King, and Marconi. Annapolis Seeds - Nova Scotia - They have Ropreco, Heinz 2653, Speckled Roman, and Heidi paste tomatoes! and a great selection of soybeans! They also have the $5 shipping thing though it does not say how many packages you can ship for that $ amount. You would have to play with your order to put in as many packages as you can get... or call them ; ) Those are my favourite seed sources for the greenhouse, and the home gardener. Have any recommendations for your favourite flowers or veggies that you want to share? Pop it in the comments below. Questions? Let me know! Happy Seed Shopping! ~ Tanja
- November Potager Tasks
You guys, what is up with this weather, eh? I was planting garlic and flower bulbs in the double-digit weather on Sunday but had a foot of snow on Tuesday! It has kept on snowing and boy is it cold. Mother Nature always makes us pay for nice weather! My fall garden tasks came to a screeching halt but here are some tasks you can be doing in your November potager if you are not yet buried in snow. Rake your leaves onto the garden beds as mulch, put them in a pile to break down into leaf mould (garden gold!), rake them around your shrubs to provide winter protection and to give beneficial insects a place to overwinter, or just mulch them up with the lawnmower and leave them on the lawn. Dahlias can be lifted after the first frost has gotten to them and turned them black. Brush or wash off the soil and place in a dry, warm, airy place to dry and cure for a week or two. I use a table in the greenhouse or place them on some newsprint on the floor in the furnace room. Once they are dry, I shove them in a cardboard box and pop them under the greenhouse table to wait for spring. At this new house, I think I will be putting them in a cardboard box and pop them into the cold room in the basement. Choose a spot that is cool and dark for them to overwinter in. You can put a bit of potting soil, sand, or vermiculite over them to insulate them a bit and keep them from going mouldy. I cover them sometimes and other times I don't. Doesn't seem to make too much difference one way or another. Prune your roses down by half to prevent them from rocking in the wind or breaking in case of snow load. You will prune them again in spring, so don't worry too much about where to cut for the best shape. Remove any broken or damaged branches at the same time. Do not wash your potatoes after you harvest them as that can cause them to go mouldy. Place them in a wheelbarrow or on a table in sheltered area to cure, like the garage, some place out of the sun. Brush off the dry soil, store the potatoes in a cardboard box with the flaps down to keep them from going green. Store them in a dark, cool area that is above zero but not too warm so that they sprout. My aunt used to keep them in a wooden box in the barn. I have no barn, so I put them in the garage, and they keep nicely all winter long. Do not put them into a container that has no air flow, or they will go mouldy. If you do not have a suitable cardboard box, use a tote bin and drill holes all around the top of the bin to let out the moisture. For carrots, if you are in a zone 7 and up, leave them in the garden all winter, harvest as needed. If you are in a colder zone, pull them, take off the tops, wash them well, let them dry, place in a tote as above. If you have not yet done so, it is time to plant your garlic. It has been a really odd year with October being very warm in most parts of Canada, too warm for planting garlic. I got the last of mine in literally 2 days before winter came. Stop fertilising your indoor plants from now till February. If you have not fed them for a while, feed them today and then leave them be for a few months. Water them less often as the days are short, they are not using as much, and most plants prefer to be kept on the dry side. Citrus trees inside. We brought my citrus trees (Meyer's lemon, Key lime, and Yuzu) indoors at the end of September, when we started getting cool at night. My greenhouse is not happening until next year but if you have a heated one, or one that you can keep above freezing, they will much prefer that to being kept inside. Here is how to over-winter them. They like to be kept around +10 C in a perfect world and the house is most definitely warmer than that, so I put them close to a window and shut off the heating vent (in the spare bedroom). They like bright! Mine are in a south facing window and are doing fine but as the days get shorter, I will be giving them some extra light. Try to give them 12 to 16 hours of (day)light daily. They like to be on the dry side, do not like wet feet or they will start losing leaves like no one's business. This is not the ideal time, spring would be best, but they really prefer a pot that breathes rather than the plastic that they come in. Buy some nice-looking terracotta pots and pot them up in good porous potting soil mixed with compost or worm castings. I am watering mine once or twice a month only. Stick your finger in the soil. If it is dry, give it a good drink. If not, wait a few more days. Just as with the houseplants, if you have not fed them recently, give them a good feed now and then let them rest for a few months. I use this Evergreen and Citrus food but here are some spikes for potted citrus that also look good, and super easy to use. If they are easy to move, put them in the tub and shower them off once a month. They will love it! If you missed Sunday's post , check it out for the info about these awesome smudges, hydrosols, and this lovely sign. Happy Gardening .. or Happy Hunkering Down if you are on the prairies ~ Tanja
- Put Your Potager to Bed for Winter in 5 Easy Steps
Next year's fantastic, healthy, organic, kitchen garden begins right here, right now. What you do now to winterise your beds, makes the difference between a great garden year ahead or a frustrating, pest filled one. Here are five easy steps you need to know to put your potager (aka kitchen garden) to bed for winter. This is how organic gardeners maintain healthy, happy beds that are 'almost' completely weed, disease, and pest free. 1. Post Harvest Clean Up! After you have harvested your summer veggies, canned and stored them to enjoy throughout the winter, it is garden clean up time. This is the most important step you can take for a pest free garden next year. Remove everything from the surface of your beds... spent tomato, squash and cucumber vines, all stems, leaves, seedlings and other plant debris lying around on top of the bed. Try to get all the leaf material and debris that you can, as they provide winter hiding spots for bugs and their eggs. Cabbage moths, stink bugs, aphids, leaf hoppers, crickets, grasshoppers, and so many more, may all be trying to overwinter their offspring in your garden. Veggie beds should be well cleaned of all plant debris in order to not overwinter pests that come to life just as you are setting in your tender spring seedlings. If there is nowhere to hide, they will go elsewhere. The only green material left standing should be your fall and winter veggies, like brussels sprouts that can be harvested straight out of a snowbank. Compost the garden waste, layering browns and greens for faster cooking compost. You can safely compost powdery mildewed plant material as the fungal spores will not survive the composting process. According to Charles Dowding, the no-dig guru, you can also compost your blighted tomato plants with no worries. 2. Weed control! Now is also the time to get rid of any weeds. Pull them by hand or knock them down with a hoe. I gently pull out all large and/or tap rooted weeds but knock down the wee ones. My favourite tool for this is the Winged Weeder. It lifts weeds out and does not disturb the soil, just skims right under the surface. You can also use a saddle hoe or any other that you may have, you just do not want it to bite deeply into the soil as that brings new weed seeds to the surface. If you are a companion planter, as I am, you will have lots and lots of volunteers at this time of year. Calendula , nasturtiums, marigolds, borage, lemon balm, all kinds of wee little sprouts springing up everywhere. I remove them all. More seedlings will sprout up again in spring. 3. Top dress! Top dressing is literally food for your soil! Feed your garden beds with 1 to 3 inches of compost or manure annually. Topping your beds annually will feed your soil, suppress weeds, make for great water penetration and retention, and keep beneficial micro-organisms thriving in your garden. You will never need to use fertilisers again. Truly. Layer the manure on top of your soil, rake to smooth out, and walk away. Nutrients will be carried through your soil by the elements, the earthworms, and the beneficials that live in your soil. Do not dig in, do not turn your soil, and do not roto-till. Rototilling destroys soil structure, not to mention what it does to the earthworms, beneficial insects, microbes, and fungi threads. Eep! Investing in your soil, feeding it to make it rich, fertile, and friable, is the single best investment you can make towards a fantastic, healthy, productive kitchen garden. 4. Test and Amend! Test your soil to check for deficiencies and amend accordingly. Do not dig in, just layer on with your manure and you are done. The amendments will be carried through your soil by the winter rains and earthworms, ready for you to plant up again in spring. Organic amendments may be wood ashes, lime, alfalfa, bone meal, blood meal, blood meal, rock phosphates, seaweed, anything organic that will raise your nitrogen, phosphorous, potassium, or mineral levels. Amending now means that the nutrients have time to break down over the winter months and are therefore available for your seedlings to uptake in spring. Some nutrients will take 4 months or more to become accessible in the soil. Organic gardening is all about feeding the soil to feed the plants. The more time and effort that you put into it now, the less work you will have next summer. You will not have to feed your plants in summer, at all, when you feed your soil. 5. Beneficial insects! So ... Now that you have removed all the leaves and bits of debris from your veggie garden, you may be wondering where the beneficial insects, like ladybugs, are supposed to over winter? Easy answer ... anywhere and everywhere, except in your food garden! You want to make your yard a wildlife haven so that the good guys are there, all around, thriving and more than happy to eat up your bad guys in spring, before they find your kitchen garden and attack your veggies. Make the rest of your yard a paradise for birds, bees, frogs, snakes, spiders, bats, and all kinds of other beneficial insects and critters by creating a wildlife friendly habitat. Leave your ornamental grasses and perennial flowers standing to offer seeds for birds and refuge for critters and insects. Some bees and good insects will over-winter in the hollow stems of your flowers. Make brush piles, and wood piles, or raked leaf piles. Mulch around your trees, shrubs and perennials with wood chips, or bark, for them to live in. They (ladybugs) also love to live in your wood lot! Make a bug house, they are both super cute and fun to make with your kids. Sure, the bad insects may over-winter in them, too, but if you have a healthy organic garden with great diversity, the good guys will soon get rid of them. You want your yard to be a year-round home for all small critters and insects, so provide places for them to hide, live, reproduce and be. You will have a fantastic, happy, healthy yard, and a super happy kitchen garden! By keeping a clean food garden, the pests will not wake up in spring, in the food garden. By the time they wake up and find the new tender seedling, your beneficial insects will also be awake and ready to take them on. This is one part of your integrated pest management and super easy to do. This post was originally written in 2017 at my last potager, you can find that blog here. I updated it a titch. Happy Fall Clean up ~ Tanja