Put Your Potager to Bed for Winter in 5 Easy Steps
- Nov 3, 2022
- 5 min read
Updated: Aug 26, 2024

Next year's fantastic, healthy, organic, kitchen garden begins right here, right now. What you do now to winterise your beds, makes the difference between a great garden year ahead or a frustrating, pest filled one.
Here are five easy steps you need to know to put your potager (aka kitchen garden) to bed for winter.
This is how organic gardeners maintain healthy, happy beds that are 'almost' completely weed, disease, and pest free.
1. Post Harvest Clean Up!
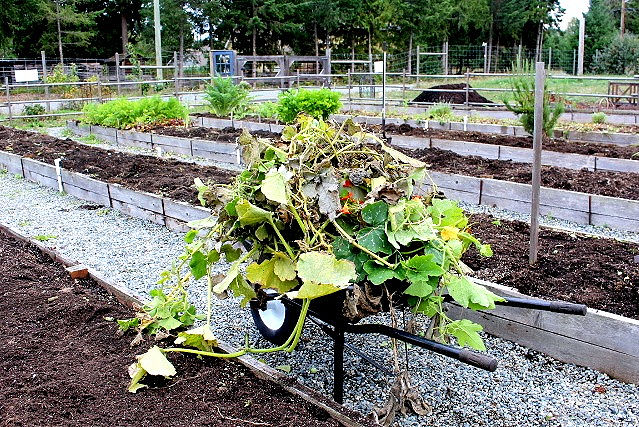
After you have harvested your summer veggies, canned and stored them to enjoy throughout the winter, it is garden clean up time. This is the most important step you can take for a pest free garden next year.
Remove everything from the surface of your beds... spent tomato, squash and cucumber vines, all stems, leaves, seedlings and other plant debris lying around on top of the bed. Try to get all the leaf material and debris that you can, as they provide winter hiding spots for bugs and their eggs. Cabbage moths, stink bugs, aphids, leaf hoppers, crickets, grasshoppers, and so many more, may all be trying to overwinter their offspring in your garden.
Veggie beds should be well cleaned of all plant debris in order to not overwinter pests that come to life just as you are setting in your tender spring seedlings. If there is nowhere to hide, they will go elsewhere.
The only green material left standing should be your fall and winter veggies, like brussels sprouts that can be harvested straight out of a snowbank.
Compost the garden waste, layering browns and greens for faster cooking compost. You can safely compost powdery mildewed plant material as the fungal spores will not survive the composting process. According to Charles Dowding, the no-dig guru, you can also compost your blighted tomato plants with no worries.

2. Weed control!
Now is also the time to get rid of any weeds. Pull them by hand or knock them down with a hoe. I gently pull out all large and/or tap rooted weeds but knock down the wee ones.
My favourite tool for this is the Winged Weeder. It lifts weeds out and does not disturb the soil, just skims right under the surface. You can also use a saddle hoe or any other that you may have, you just do not want it to bite deeply into the soil as that brings new weed seeds to the surface.
If you are a companion planter, as I am, you will have lots and lots of volunteers at this time of year. Calendula, nasturtiums, marigolds, borage, lemon balm, all kinds of wee little sprouts springing up everywhere. I remove them all. More seedlings will sprout up again in spring.

3. Top dress!
Top dressing is literally food for your soil! Feed your garden beds with 1 to 3 inches of compost or manure annually.
Topping your beds annually will feed your soil, suppress weeds, make for great water penetration and retention, and keep beneficial micro-organisms thriving in your garden. You will never need to use fertilisers again. Truly.
Layer the manure on top of your soil, rake to smooth out, and walk away. Nutrients will be carried through your soil by the elements, the earthworms, and the beneficials that live in your soil. Do not dig in, do not turn your soil, and do not roto-till. Rototilling destroys soil structure, not to mention what it does to the earthworms, beneficial insects, microbes, and fungi threads. Eep!
Investing in your soil, feeding it to make it rich, fertile, and friable, is the single best investment you can make towards a fantastic, healthy, productive kitchen garden.

4. Test and Amend!
Test your soil to check for deficiencies and amend accordingly. Do not dig in, just layer on with your manure and you are done. The amendments will be carried through your soil by the winter rains and earthworms, ready for you to plant up again in spring. Organic amendments may be wood ashes, lime, alfalfa, bone meal, blood meal, blood meal, rock phosphates, seaweed, anything organic that will raise your nitrogen, phosphorous, potassium, or mineral levels.
Amending now means that the nutrients have time to break down over the winter months and are therefore available for your seedlings to uptake in spring. Some nutrients will take 4 months or more to become accessible in the soil.
Organic gardening is all about feeding the soil to feed the plants. The more time and effort that you put into it now, the less work you will have next summer. You will not have to feed your plants in summer, at all, when you feed your soil.
5. Beneficial insects!
So ... Now that you have removed all the leaves and bits of debris from your veggie garden, you may be wondering where the beneficial insects, like ladybugs, are supposed to over winter?
Easy answer ... anywhere and everywhere, except in your food garden! You want to make your yard a wildlife haven so that the good guys are there, all around, thriving and more than happy to eat up your bad guys in spring, before they find your kitchen garden and attack your veggies.
Make the rest of your yard a paradise for birds, bees, frogs, snakes, spiders, bats, and all kinds of other beneficial insects and critters by creating a wildlife friendly habitat.
Leave your ornamental grasses and perennial flowers standing to offer seeds for birds and refuge for critters and insects. Some bees and good insects will over-winter in the hollow stems of your flowers.
Make brush piles, and wood piles, or raked leaf piles. Mulch around your trees, shrubs and perennials with wood chips, or bark, for them to live in. They (ladybugs) also love to live in your wood lot!
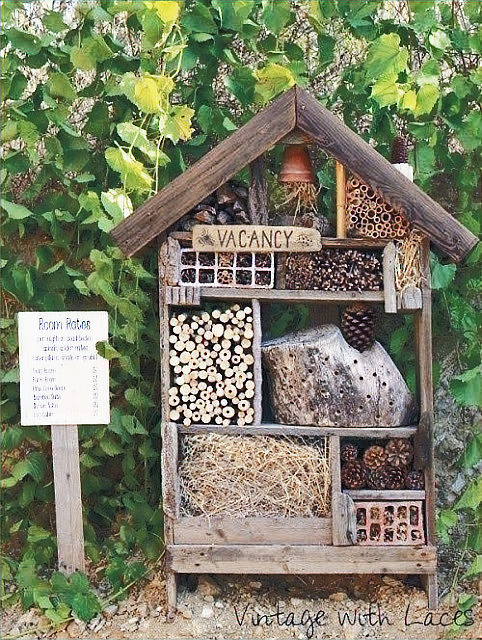
Make a bug house, they are both super cute and fun to make with your kids. Sure, the bad insects may over-winter in them, too, but if you have a healthy organic garden with great diversity, the good guys will soon get rid of them.
You want your yard to be a year-round home for all small critters and insects, so provide places for them to hide, live, reproduce and be. You will have a fantastic, happy, healthy yard, and a super happy kitchen garden!
By keeping a clean food garden, the pests will not wake up in spring, in the food garden. By the time they wake up and find the new tender seedling, your beneficial insects will also be awake and ready to take them on. This is one part of your integrated pest management and super easy to do.


This post was originally written in 2017 at my last potager, you can find that blog here.
I updated it a titch.


Comments