Growing Great Garlic In Alberta
- Oct 17, 2022
- 7 min read
Updated: Jun 18, 2024
I have now been growing garlic for about 14 years, but this was my first time planting it as a food crop in a zone 3 garden.

Is crazy good how wonderfully the world has evolved around organic gardening, understanding soil, and self-sustainability over the past decade.
When I last lived and worked at a garden centre here in central Alberta, we sold garlic but boy, was it ever different from now. Fall bulk garlic did not exist, you got 3 bulbs in a mesh bag, not much choice for variety, think it was like white or red, and it was always sold in spring.
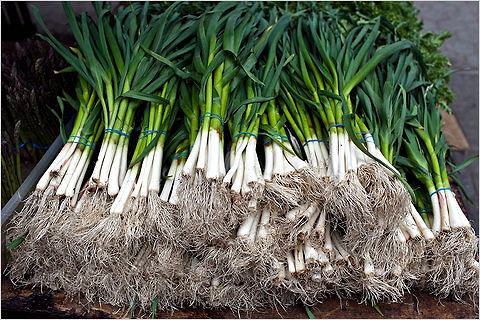
Garlic needs to go through the cold of winter to break into cloves, so that bagged garlic we sold in spring didn't stand a chance. Spring garlic is actually a bit of a specialty item that has yet to catch on here in Canada. Is sold in European markets, looking like thicker green onions. They are super yummy, taste mild and sweet, highly recommended. However, they are not what we think of garlic and will not keep in storage. If you have room to grow some extra, harvest your garlic rounds in spring and see what you think.
Today though! Garlic is grown on farms in every province for purchase in fall, at real planting time! Here is a link to some Alberta garlic farms. Buy in person or order online. You can also buy organically grown bulk garlic at most all garden centres, farmer's markets, and some specialty shops. Here is a great farm in BC to order from.
How to Grow Garlic!
The basics of garlic planting and growing are the same wherever you live. It is a heavy feeder so needs really great soil that is rich in nutrients.
1. Soil is Everything!
Although the previous owners of our home were avid gardeners, the soil here is very poor, has not been fed or amended in years. We brought in 7 yards of organic garden soil to give us a head start in spring and will continue to feed the soil with organics to make it healthier and less heavy. It takes time to 'make' great soil, we will be amending in both spring and fall for some time to come.
Garlic needs great soil to make great bulbs. If you are getting small bulbs, plant bigger cloves in fall and feed your soil well. Top dress your bed with compost or manure. I usually like to do this a few weeks before planting, but it can be done at any time, including planting day itself.
You want your soil to be well-draining as garlic will rot in wet, boggy soil. Adding organic matter to your bed will better your drainage. Try to avoid peat moss. It adds no nutritional value to your bed and is not a renewable resource. Instead, use shredded leaves, leaf mould, browned grass clippings, fish compost, compost, or any manures. I like chicken manure the best, but any kind is amazing.
2. When to Plant?
Late summer or early fall, when mornings are starting to feel crisp. This can be anytime between mid-September and early December, depending on where you live and what the weather is like. My usual planting time on the west coast, was around Hallowe'en and here in Alberta, many have said that mid to late September is the norm. We are having an exceptionally warm and dry fall in the western provinces, so everyone has held off planting by several weeks. My garlic went in just the other day, so mid-October.
3. Where to Plant?
Plant in a full sun area, where the garlic will get 8 hours of sunshine daily.
Do not plant near big trees with hungry roots, or in weedy beds. Garlic does not compete well for water and nutrients so you will end up with small bulbs.
You do not need to rotate your garlic. Yep, I really said that : ) If you have one spot that is perfect for garlic, you can keep planting in that same bed forever and ever... unless you get a soil borne disease. If you had white rot, soft rot, or any of the other issues that affect the garlic in the ground, you cannot use that bed again for alliums of any kind.
However, if you had rust on your foliage, not to worry. Rust is caused by high humidity or lots of rain, it is not a soil disease so will not spread.
Bulbs that looked good at harvest but are growing blue in the curing shed need better air flow, less layers of skin, or a drier area to cure. They also may have been nicked by the fork at harvest time, bruised or damaged when setting the bulbs out to cure, thus allowing bacteria to enter the bulb.
Nematodes and wire worms are getting to be an issue in some areas. They burrow into the bulbs, allowing soil and bacteria to enter the bulb so that it wilts in the ground or does not cure. The best way to cut back on these pests is to grow mustard in the bed after harvest, or before planting. Plan ahead, if you tend to have an issue with either pest, plant mustard in spring, in the bed that will be your garlic bed that fall. Plant mustard in the potato and carrot patch, as well.
Make sure to clean up your bed of all plant debris that may be housing disease. No old veggie leaves or stalks left lying in the bed to break down, especially anything from the allium family. Toss them in your compost bin instead.

4. Choose Your Best Cloves
For the biggest and best bulbs at harvest, you want to choose the biggest and very best cloves at planting. Save the smaller ones, and any with nicks or bruises, for the kitchen. The cloves should be firm, no soft spots.
There are two kinds of garlic, softneck and hardneck. Hardnecks are super hardy, are easy to grow anywhere while softnecks are more suited for warmer, more temperate climates, zone 5 or better.
I am growing 9 varieties of hardneck garlic this year. I brought all my favourites with me from the island. Will see how they fare here in a Zone 3.
In Porcelains, I have Northern Quebec, Yugoslavian, French, and Shuswap Delight. These have very white skins, are super hardy, and so easy to grow anywhere.
In Rocamboles/Purple Stripes, I only have Rocky Red and Persian Star this year. I would love to get more 'purple' varieties for next year.
In my specialty group, I have what are often called 'Weakly Bolting Hardnecks'. I have Korean Red, Salt Spring Extra Early, and the highly sought-after Rose de Lautrec.

5. How to Plant?
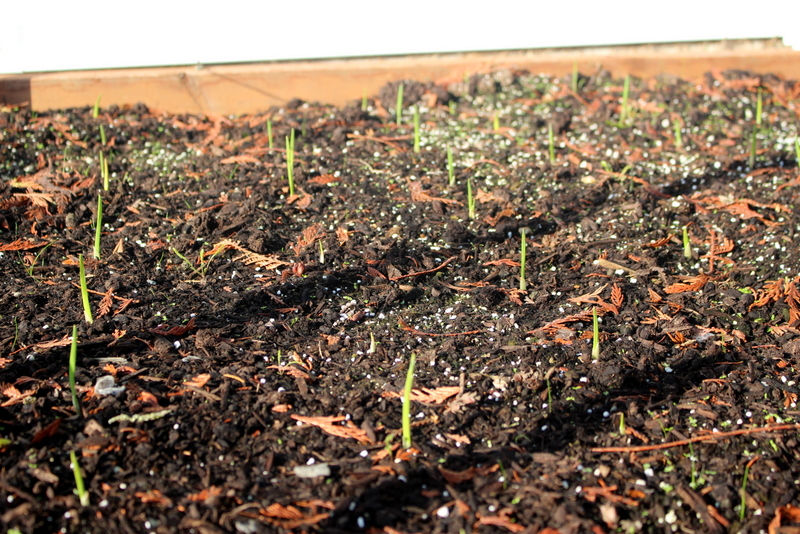
If you have nice, friable soil, you can just push the cloves into the ground. If, like me, you have lumpy, bumpy, clay soil, you will need to dig a trench to pop your cloves into. This is my newly purchased, good garden soil... now you know why I need to amend with organics for quite some time.
In temperate areas, zones 6 and up, push your garlic 2 inches deep into the soil. In colder areas, like my zone 3, plant 4 to 6 inches deep.
For the biggest bulbs at harvest, spacing is key. Planting 6 to 8 inches apart, in rows that are 6 to 7 inches apart, will give you the best sized bulbs. Farmer guy, my garlic supplier for many years, went with a 7-inch spread, so that is usually my norm. Here is a very in-depth trial about spacing, if you want to geek out : )

This is a good time to add manure, compost, or other amendments to the planting trench. A good phosphorous source to help your garlic set roots and get established before fall comes, is bonemeal or rock phosphates. I went with this multi-purpose Acti-Sol Hen Manure, which is great for everything.
If you have good soil, this step is not necessary, but won't hurt either : )

It also is said to repel squirrels, so if you have an issue with your tulips, give this a try. I tossed it in pretty liberally as this is new soil that I have not fed yet.

6. Cover and Water
Bury your cloves. If they are in deep trenches like mine, rake the soil over the cloves, remove any of the big chunks.

On the island, I used to just push the cloves into the soil so that the tip of the garlic was about an inch below soil level and walk away. When the winter rains came, they would level out the soil in the beds. For more information about planting garlic on the west coast, see my old blog HERE.

Water in well to help your garlic root in before winter. If the soil in your bed is really dry, the water will take a while to penetrate and percolate. It may bead up on top as the heat and drought will have created a bit of a crust on the surface. You can rough it up a bit with a hoe, or just let the sprinkler slowly do its magic. I leave the sprinkler on for an hour or two.

7. Cover with Leaves or Straw
If you are in a cold winter area, mulch with a good layer of leaves or straw when you start getting good frosts. I will do this when the leaves fall from the trees and when Farmer Jason drops off a few bales of straw for me. The straw mulch will keep the garlic from heaving with the frosts. If you live in an area where the ground freezes and thaws, you want to mulch.
If you live in warmer areas like the wet, west coast, there is no need to mulch. In fact, mulching will just provide a place for slugs, snails, pillbugs, earwigs, centipedes, and other critters to overwinter. You do not want these guys waking up in your food garden in spring. The bed on the left in the pic above was my garlic bed. It was top dressed with compost and then covered with mesh to keep the kitty from using it as a potty. The straw is actually covering the dahlias as I was too lazy to dig them up that year. It was a trial. Five of the seven dahlias made it, one had been eaten entirely, and one was partially hollowed out by pests but grew anyway.

8. Remove Mulch
In spring, when things start warming up, remove the straw so that your garlic starts to warm up and grow. Remember that the mulch insulates and holds in the ground temp so if you leave it on, it will take longer for the ground to warm up.
This is also a good time to side dress with a slow-release fertiliser, bloodmeal, compost, or manure to feed your garlic, if you feel that it is needed.
Harvest in summer, when half of the leaves have browned off.

That's it. Garlic is super easy to grow and very, very satisfying.
After you taste homegrown garlic, you will never go back to that dried out stuff they sell at the grocers.
Fresh garlic is sticky, is hot, spicy, is very yummy.


Comments