Have Fantastic Planters & Baskets All Summer Long
- Jun 16, 2023
- 8 min read
Updated: Jun 19, 2023
Here are some great tips to keep your baskets and planters looking amazing from spring till fall, whether you do up your own or buy them ready made at the greenhouse.

Hanging Baskets - While I drool over the ready made baskets, already full of blooms, I absolutely love making my own baskets in spring. It's a spring ritual that makes my heart sing.
I start by greenhouse hopping, shopping for flowers in new colours and new ideas with no set plan. I know what I like, of course, but I look for new colours to try, new varieties, and love to see what fun things each place is selling.
The planting up is the best part. Putting together the plants I picked out in different combinations for the sun, shade, and part sun areas of the yard. When I was running the basket workshops at my wee greenhouse, I was always amazed at how beautiful and different everyone's creations were, using the same selection of plants!
Here is everything you need to know about hanging baskets...
To make your own, you want to buy the biggest baskets that you can find/afford. Bigger baskets mean more plants and bigger impact, but more importantly, they have more root room and do not dry out as fast, so flowers thrive.
Buy the 14"or 16" baskets, never any smaller. I prefer to buy the metal ones with a coir liner as they last for many years... I have had some of mine for 18 years!

When the coir liner gives out, you can buy a new one, make it into a moss basket instead, use burlap or coir sheeting as a liner. Get creative. You can also pop a pot into the basket which looks so amazing.

Put a paper plate, plastic saucer or plate from the dollar store, or even just a sheet of wax paper or cling wrap into the bottom of your coir basket to stop the water from just flowing right out. You just want something at the bottom to slow down the water, have it sit around for a while so that the roots can take up the water. I like paper plates as I can dump the whole thing into my compost bin in fall and not have to root out anything.

Fill loosely with potting soil to the very top. You do not want to push it down or take all the air out of the soil. Just fill to the top. The soil will settle as you water.
Use a good quality potting soil, I like Sunshine or Pro-Mix, and add a little bit of manure or compost. My 'secret recipe' is 5 parts potting soil to 2 parts manure. I use this recipe for anything in a pot, basket, planter... a vessel of any sort. Good soil is important.

Nestle your plants into the soil, pushing the soil around the base of the plant. As you left the soil loose when you filled it, is easy to make a wee hole in the soil, put in the plant, and firmly tuck the soil in at the base of the plant.
Scatter some slow release fertiliser in the soil around the plants, tickle it in a bit. This will gently feed your plants each time you water. This is great for people like me who rarely remember when they last fed their baskets, helps to keep them healthy and flourishing.
Tip - I use the thriller, filler, spiller planting method.
A Thriller plant in the center. I like geraniums for sun and begonias for shade but use anything you like. Maybe a fancy petunia or a salvia.
Fillers are plants that grow upwards and fill in all around the thriller to make a full, big looking basket. This may be lobelia, diascia, clumping petunias, upright verbena....
Spillers are the ones the trail or drape. They might trail a long ways like thunbergia and ipomea, or drape a little bit like creeping jenny, petunias, verbena, or bacopa.
How many plants do you need? While there are many variables, this is the formula I use most often.
12" basket (or planter) = 1 thriller and 5 plants.
14" basket (or planter) = 1 thriller and 6 plants.
16" basket (or planter) = 1 thriller and 8 plants.
18" basket (or planter) = 1 thriller and 8 to 10 plants.
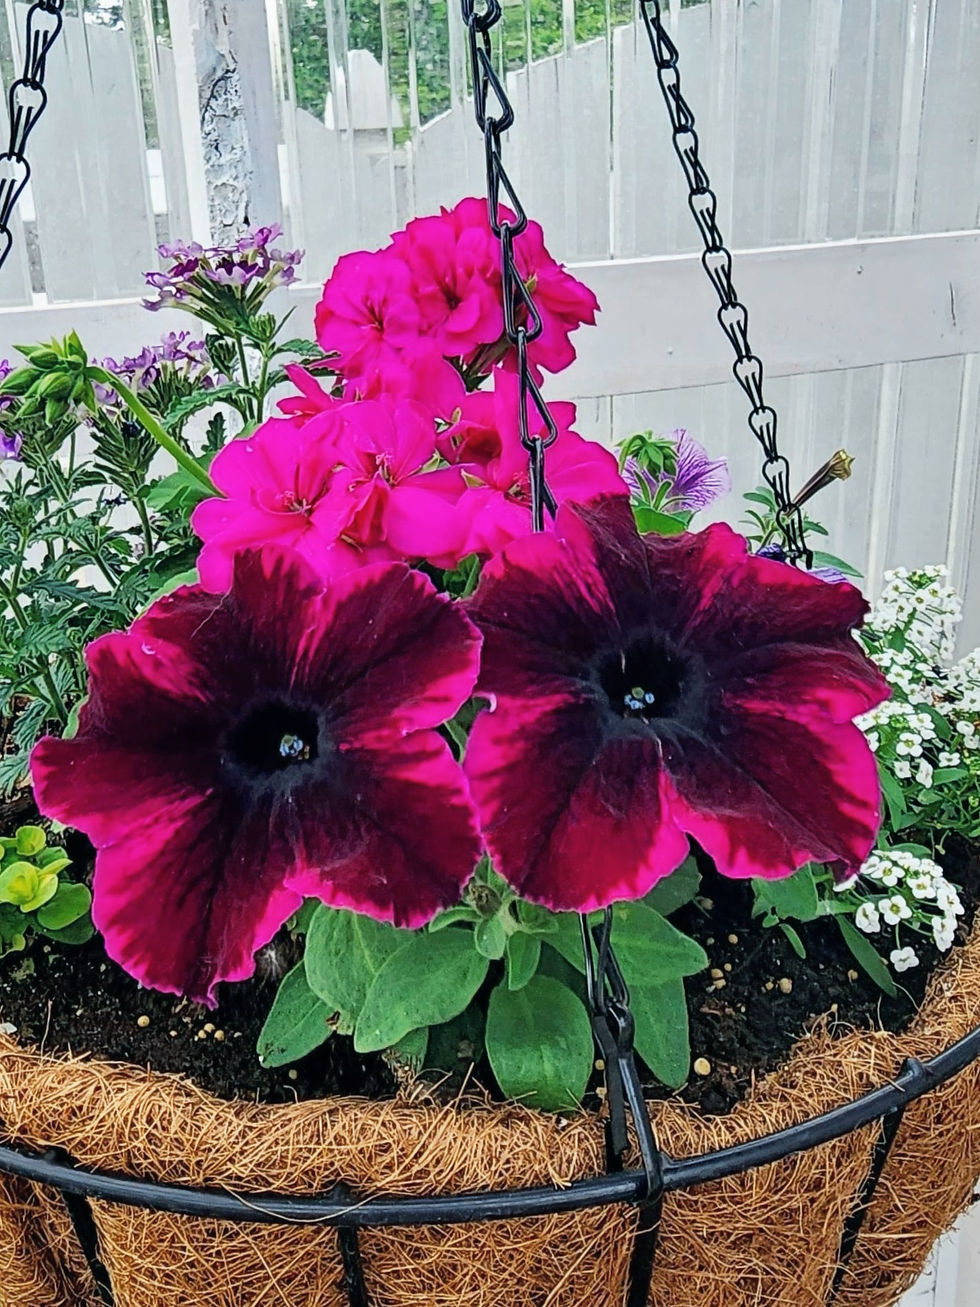
Place your plants an inch of two in from the edge of the basket rather than right at the rim. This will give you a nice full looking basket when it fills out and gives them more root room. Not to worry, the flowers will find their way over to the edge.

Here you see that they filled out to the edge in just a couple of weeks and the basket looks full. Will be spilling over the edges in no time.
Watering Baskets

To keep your baskets happy right till fall, you want to water and feed your baskets on a regular basis.
While the plants in your basket are small, you will only need to water every 2nd, or even every 3rd day. Stick your finger in the soil to check for moisture. If damp, wait another day.
As the summer goes on and the basket fills out, you will need to water more often. My rule for baskets on the south side of the house is to water once a day most times but water morning and evening when the temps hit 30 plus. That is only in dead of summer, when they are nice and full, using all the water that you are giving them. Do not drown your baskets.
If you over-water your baskets, they will not thrive, the roots will start to rot and is hard to bring them back from that. If this happens, let them sit in a shaded spot for 3 or 4 days to dry out. Pinch back any stragglers, deadhead, remove dead plants. Give them time to bounce back. Once the soil feels like it is mostly all dry, put new plants in any dead spots, give them a mild dose (half strength) of a water soluble fertiliser (or preferably liquid seaweed if you have that), place them back out on the hook to get some sun.

If you missed a watering or two, the soil in the basket will have dried out. When peat based potting soil dries out, it shrinks up into a tight ball that the water is unable to penetrate. The water simply runs down the sides of the dry soil ball and out the bottom.
Re-hydrate the soil by placing it into a bucket or sink full of water, ideally in the shade, for 3 to 12 hours to recuperate. Most plants will pop back after a good long soak. Remove any plants that did not pop back, replace or leave that space and the others will soon fill it in. Popping in a nasturtium seed in dead spots is a quick fix, my trick to a full late summer basket when others are starting to peter out.

In addition to proper watering, you will need more than the slow release fertiliser to keep the baskets blooming. Once a week, or every second week, give them a shot of water soluble flower food, or an all purpose fertiliser.
The food you use on flowers will have a larger middle number like 15-30-15, or similar, for more blooms and strong roots.

You can see that this hanging basket (I removed the hanger) that I was given as a housewarming gift is already starting to have less blooms a few weeks after it was given to me.
When you buy a small 10 or 12 inch hanging basket from a box store in spring, it will be flourishing when you first bring it home but will soon start to look bedraggled. They are fed a while lot of fertiliser to get them looking that full and lush so early in the season but cannot maintain those blooms for long after you take it home.

Take the plants out of the basket and pop them into a larger basket or planter with fresh soil and a bit of slow release fertiliser. They will start to flourish again, giving you bloom after bloom.
Pots & Planters

Pretty much the same rules apply when you make up your planters, pots, and window boxes.
Use the same 'secret recipe' potting soil as for the hanging baskets. If you still have soil in your pots from last year, scoop it out and mix it with new soil compost mix to rejuvenate it, put it back in the pot.
Place something over the holes in the bottom of the pot. I often use coffee filters but a flat stone, a broken piece of terra cotta, and upside down plastic pot from your new flowers, anything like that will work.
Do not pack down the soil as that makes it hard for the roots to spread, but loosely fill it right to the top. Make a small hole, pop in your flowers, firm the soil around the base of the flower. The soil level will drop about an inch when you start to water, so do not worry about your pot being filled to the brim.
I use the thriller, filler, spiller recipe in pots, also.
If the pot is going right beside a wall, put the thriller in the back middle of the pot, add a row of fillers, and then add the spillers to trail over the sides.

If the pot is going to be seen from all sides, put the thriller in the middle and then alternate the fillers and spillers around it. The thriller in my big pot is a stunning pink salvia that the bees, butterflies, and hummers are going to love... but the blooms are not quite yet open in this picture. Haha, of course they aren't. Sigh.
Water and fertilise as above with the hanging baskets. My pots are still only being watered every third day at this point. Even though they are in clay pots, and with the all the heat and wind we are having, the flowers are still young, do not yet have big deep root systems, so they require less water. In the dead of summer, they will get watered every day or two.
To keep everything blooming, don't forget to deadhead. I walk around and pluck something all the time. I place wicker baskets here and there around the yard to put the spent blooms and weeds in.
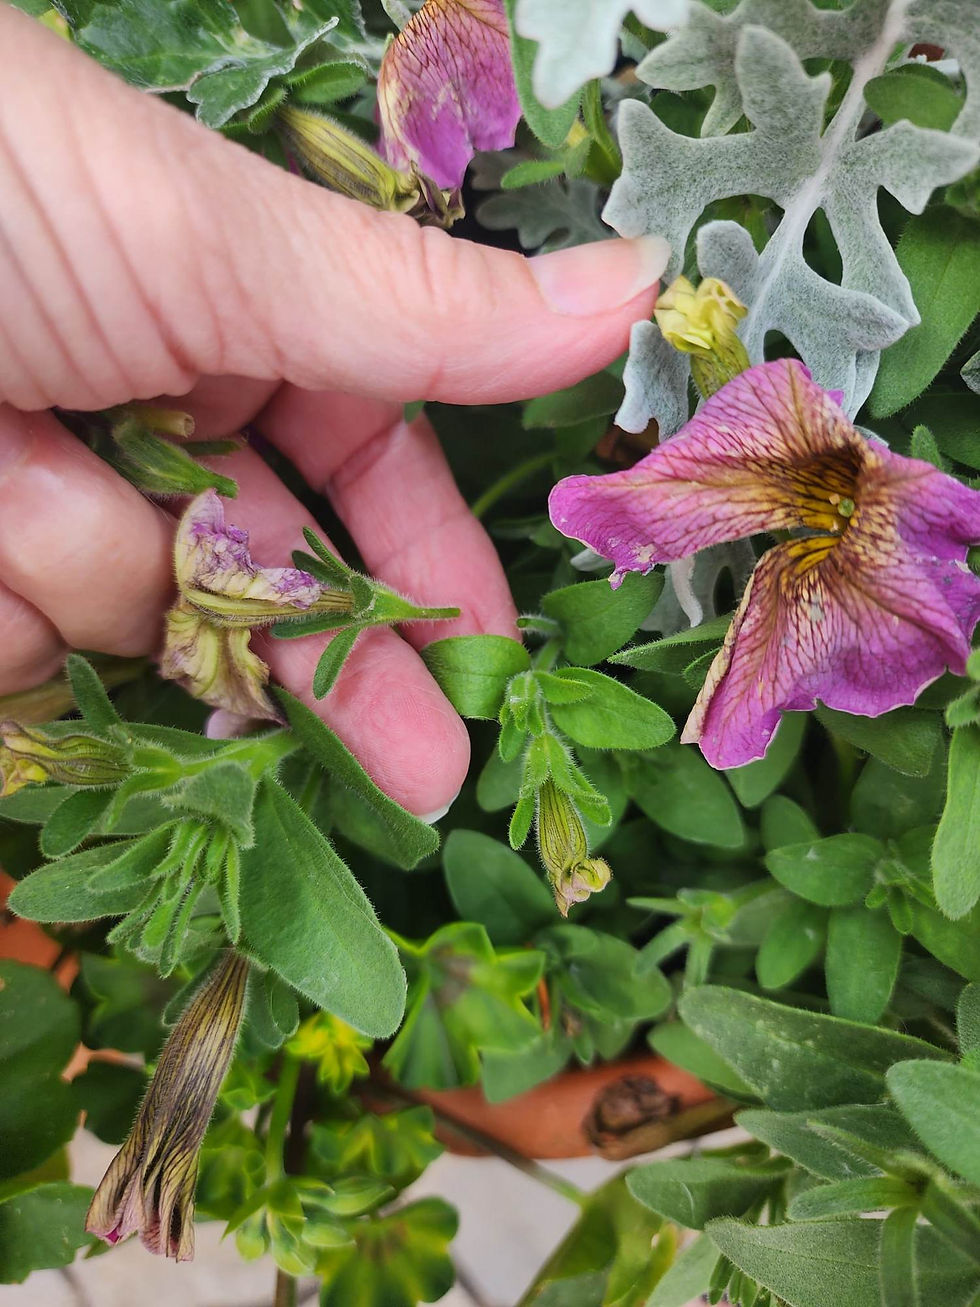
When deadheading petunias, do not just pull out the flower, tempting as that is. You need to pinch the stem behind the blossom or that flower cap becomes a seed head and will take away strength from the blooming.

When the sales come along, if you are still on the hunt for new pots, planters, or baskets, pick them up even though the flowers are long, stretched out, not looking it's best.
I needed two planters for my front stoop and happened to find two matching ones at a great price at the local No Frills grocery store. After I pulled out the dead bits, pinched back the calibrachoas that were lanky and going to seed, deadheaded the spent blooms, they were spectacular. The long pink cali in the front will get pinched back later, for now it is in full bloom so I am leaving it be.

Just plant what you like, there are no rules. All colours work with each other. If you have a mix, it is called a Victorian planting, or maybe you like monochromatic and just want to do all whites, all pink, all purple. Do what makes you happy. Sometimes, I just pop a few plants into the pot and call it that. These charming clay pots have three plants in them, and I adore them.
There are no rules for the plants you choose but follow the rules for watering and feeding for happy, thriving, blooming baskets and planters.
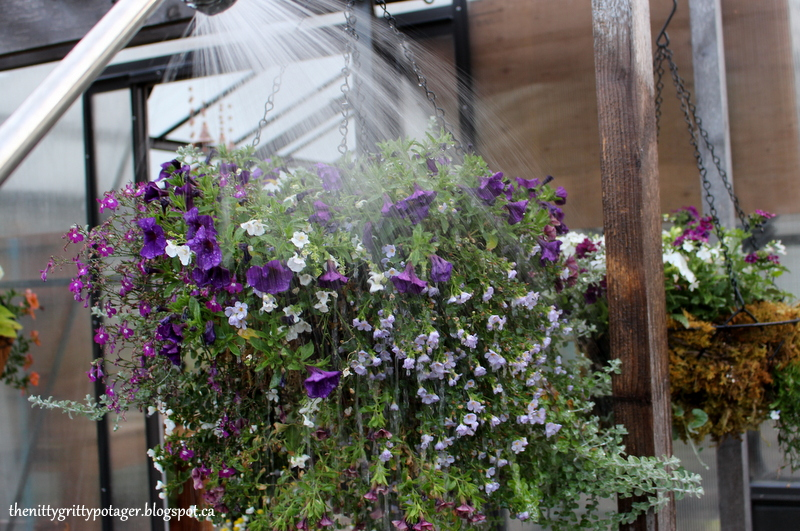
In summer, when you are watering, blast the flowers and foliage with a strong spray of water each time you water. This will rehydrate the foliage, blow off dead debris, and also gets rid of any bugs that may be trying to settle on your verbenas or petunias. I learned this trick from a bookshop vendor in Sidney By The Sea on Vancouver Island. He had the most amazing big baskets in front of his shop and said he did this every day to keep them looking their best.

Wishing you a great summer, full of colour and beautiful flowers ~ Tanja
.


So helpful, going to get some fertilizer and sale planters. Thank you!
That was one of the classes I wished I could do with you, so this article will help me a lot. Thanks.