Garden Shorts - How to Grow Zinnias from Seed
- Aug 23, 2023
- 5 min read
Those of you who have followed me for a little bit know that I hate to start plants indoors. All that fussing with pots, soil, lighting, heating... If I can direct sow, I always choose that option.
Luckily, though zinnias can be fussy to start indoors (are prone to fungal issues), they are dead easy to direct sow and grow in the garden.

Direct sown zinnias always work out. They germinate and grow beautifully as long as they get heat and sunshine. They're super easy to grow, come in a wide range of colours, the blossoms last forever, and make beautiful bouquets.
Best of all... they thrive on neglect! You don't even have to deadhead if you don't want to. If you are great at growing cacti and succulents, rarely remember to fertilise, are much too busy with life to fuss in your garden, zinnias are the perfect flower for you!

How To Grow...
Buy loads of seeds for the biggest impact. The seeds are inexpensive. For the cost of what you would pay for one basic bouquet at the grocers, you can get 5 packages which gives you tons of bouquets. If you really, really love them, as I do, buy more ; )
Sow the seeds in early spring, about 4 weeks before your last frost date. On the island, I always direct sowed in mid-April, unless the weather was super soggy. In that case I waited a week or two, at most, till the beds were drier. Here on the prairies, I can sow at the end of April, early May at the latest.
I am a no-dig gardener so I always feed my beds with some manure in fall so they are good to go in spring. If you do not, you can always rake in some compost or manure in spring. Spread some manure/compost on top of the soil, rake in lightly. Done : )

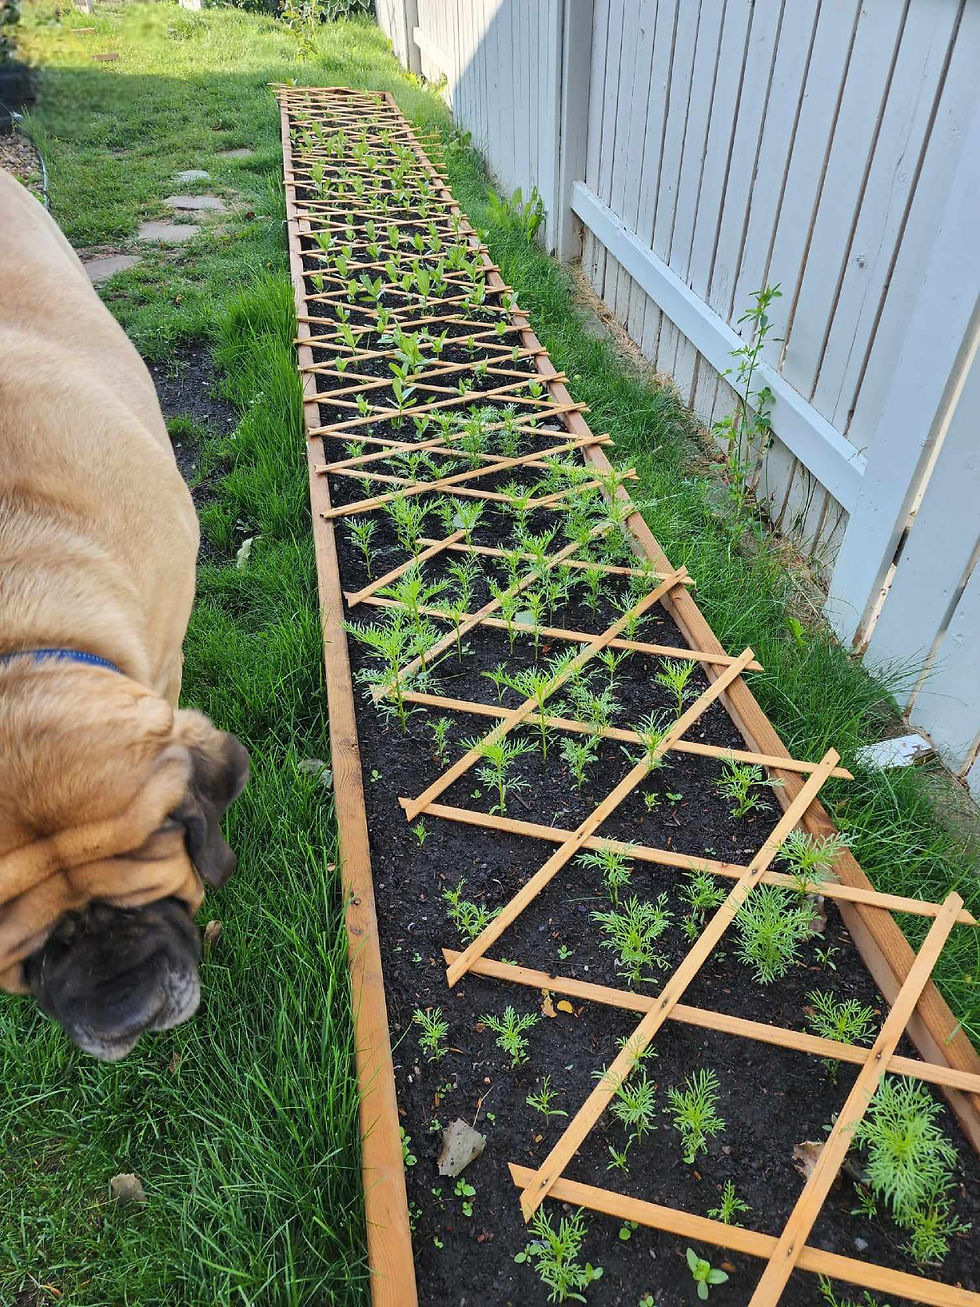
Rake the bed smooth (with a bow rake, not a leaf rake). Scatter the seeds on the soil. Try to get them well spaced out at about 4 to 6 inches apart. If you are a really dedicated gardener, you can go along and push the seeds into the soil about 1 cm deep (half inch). Or you can sift some soil right on top of the seeds so they stay in place and are covered.
That is what one should do... me, I am a lazy gardener with terrible arthritis so I try to never ever bend down if I don't have to. So I run that bow rake through the seeds, pushing it to-and-fro a bit, which seems to bury the seeds to the right depth.
Tamp down the soil with the back of the rake to keep the seeds in place when watered.

Water the seeds daily till they germinate, unless you planted in rainy season, then only water on the days you get no rain. You'll get better, more consistent, faster germination if you keep the soil damp-ish till they germinate.

Once the seedlings come up, if they have moved around during the watering time/rainy season, they are super easy to move. Dig up the wee seedling and move it wherever you have a pocket of space. Water in well and it will quickly root into it's new home.
Thin out the seedlings. You want to have the seedlings spaced 6 to 12 inches apart. I push my luck and have mine 4 to 6 inches apart. The seedlings are easily rooted into a new bed or pot, no need to waste the seedling.
When they are 6 inches tall, you can pinch the tops to make them branch out. Again, as I have arthritis, I do not do this as it means more bending ~ hah! I just leave them be and find that they branch out just fine on their own and even more each time you harvest some flowers for your vases. That said, if you have time and remember to pinch them at this stage, they will bush out more from the bottom so you need less seeds/seedlings to cover the bed.

Zinnias will keep on going well into fall. And honestly, they look pretty amazing even when they start to fade with the season. I leave them go as long as I can, till they go black from frost.

Seed Saving

You can easily collect your own seeds from the spent blossoms. Wait till the flower is brown and dry, harvest the blossom, leave to dry in a warm, sunny place for a few days. Then pull the petals out of the flower head, or you can rub the flower between your fingers to loosen the seeds from the flower head. The seeds are the arrow shaped bottom part of the petal.

Remove the petals from the seeds and place in a shallow bowl. Leave the petals to dry another day or two before you winnow. I just blew across the top of the seeds. Anything that blows away is either debris or are sterile seeds. The heavier seeds, the ones that stay in the bowl when you blow across it, or into it, those are the viable seeds.
Package the seeds into an envelope, label with the name and colour you think they will be.
Many zinnias are hybrids so the seeds will not look exactly the same as the parent flowers. They will be pretty nevertheless, totally worth saving and growing.

Seed Suppliers
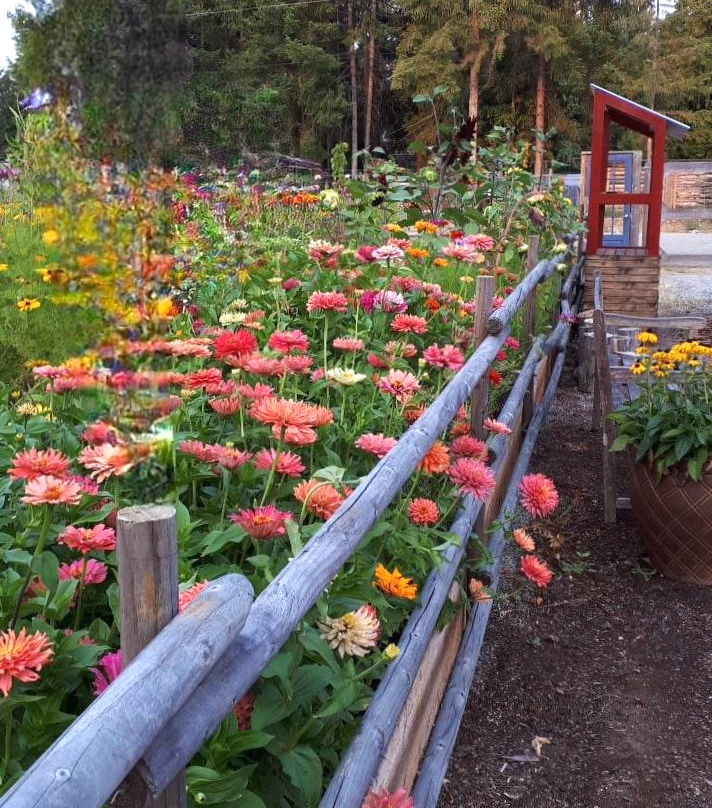
You can buy zinnias that are all the same colour, are all in the same colour family, or in various combinations of colours. In the picture above, I have planted them all in blocks of solid colours.

My favourite zinnia seed suppliers are...
Some varieties will have few seeds in the package, such as the new Queens (Lime, Red, Orange). So few seeds per package. Others will have lots, like the ones I recommend at the bottom of the post.

For the best seed packages that are affordable and great quality, I love Renee's Garden Seeds. They have been my go to for 2 decades or more. I love their zinnia packs as they have such great colour combos, from cool colours to hot colours, or buy them in single hues, as well.
Floret Flower Farms is my next go to but they are harder to get seeds from. They sell in spring and fall only and sell out super fast, like in one day. You have to sign up for their newsletter in order not to miss out on that sales day. I love their seeds though as they do not do a lot of mixed hues, and the seeds are of great quality. They also have some of their own pastel blends coming real soon - I can hardly wait! See their new breeding info here.

Baker Creek Seeds is also a fantastic source for zinnias in all sorts of colours. The new Queens are very pretty but keep in mind that there are very few seeds in each package so in order for them to make a punch, you will need several packages to plant in a block.
Stems Flower Farm is a bit like Floret in that they sell really wonderful flower colours and combos, but are also quick to sell out.

Quick note... zinnias come in all sorts of sizes and shapes. Some pompoms, some singles, some that look like cupcakes. They are all pretty and I love them all. I prefer the lilliput and dwarf types in containers and the taller ones in cutting gardens, but anything goes. You grow what you like. Keep in mind that if you are growing them for the pollinators and hummingbirds, simple blossoms are better.
Happy Zinnia Growing ~ Tanja


Comments