From The Potting Shed #6 - Tips for what to do in the spring garden.
- Apr 14, 2024
- 8 min read
Can you believe that is already mid-April? Feeling the pressure to get yardwork stuff done before the weather tanks again next week for a little bit. Apparently it tanked last year at this same time, according to my brother's record keeping. Not that wonky weather in April is unexpected anyways, eh? Expect anything.

Can I just show you how great my garlic still looks? I leave them in this little enamel bowl on the counter year round and still they are keeping super well!
I also need to show off the beautiful tradescantia. Isn't it just the prettiest thing ever? I have taken cuttings from it to use in my hanging basket, this one will go into a bigger pot this summer and sit on the deck with me to show off it's lovely colours.
In The Greenhouse
I have had a million Dr's appointments these past two weeks so did do anything gardening related until just this weekend. Last year, I already had plants in the greenhouse... inside the mini greenhouse within the greenhouse, but still! Feels so good to finally have time to get out and do a bit of yard and garden puttering.
On a positive note... I purchased a lovely new enamel coated avocado green metal raised bed for the greenhouse. We were not able to fill it yet as Kamen Landscaping is closed on the weekends so I will show it off to you guys next week. I am so in love with it!
The bed is 11 feet long so fits perfectly along one long side, 18 inches tall, 2 feet wide (11'L x 2'W x 1.5'H). It is open to the ground so all the earthworms and microbial soil life will be able to get in there. There will be a foot of planting space in front of the bed for marigolds, basil, onions, and other goodies. It was like this bed was meant to be!

*As an Amazon affiliate, if you purchase an item from one of these links, I make a teeny bit of money to support my blog. It does not cost you a penny more than it would if you went to the item on your own, without my link. Huge thanks : )
Air Temp & Soil Temp
Have you all heard that the time to plant tomatoes in the ground is when you can comfortably sit on the soil with your bare bottom and not catch a chill? I mean, I would use the palm of my hand, hahaha, but that is how the saying goes. Soil temp is everything!
I had dahlias in black grower pots sitting on top of the in ground bed last year, right on top of the soil. The top of the pot was soaking up all that heat, was toasty and warm, while the bottom was soaking up all that cold from the ground.
The poor dahlias really did not take off any faster than if I had waited to plant them outside in spring, hah. Lesson learned. Keep tender plants off the ground in early spring! Even a piece of cardboard underneath would have made all the difference. I am thinking that this pretty new raised bed will warm up faster so I can plant it up earlier, but you can be sure that I will be sticking my finger down into it to make sure before I plant anything tender in it.

I hope to get out to the nursery to pick up some basket stuffers sometime soon, to get a head start on my hanging baskets. I like to start them up early (like we did at the ngp workshops - I am a creature of habit) and then hang them in the greenhouse till May long weekend, or whenever it is nice enough to safely leave them outside. The air up by the top will be nice and warm, they do not sit on the soil, so thrive in the greenhouse. These baskets from last year were planted up on the 28th of April and I used no additional heat source to keep them warm.
A greenhouse will get much warmer during the daytime than it is outside, on a sunny day, it will be about 10 degrees warmer in the greenhouse than the air temperature outside. However, at night, when things cool down, the greenhouse will be (at most) 2 degrees warmer than the air outside.
In The Yard & Garden Beds
In the warmer parts of the yard, the crocuses are coming up, rhubarb is popping through the soil, grass is greening up, and my fall sown spinach is coming up nicely.
I got my peas and sweat peas into the garden last week. Whew! I really wanted to get them in so I wasn't waiting as long for flowers and peas! The sweet peas I sowed in last fall (as a trial) have yet to poke through the soil, but it is early days yet - I am hopeful and fairly optimistic. I always sowed the flowers in November and edible peas in February on the island, btw, for those of you looking for earlier blooms and fruits.
I have direct sown some brassicas (broccoli, brussels), radishes, lettuces, and mustard greens in a raised bed to see how they all make out. I am uncertain on the brassicas but confident that the others will be honky dory. Will sow a few broccs and brussels inside to put out at the end of the month, just in case ; )

In The Potting Shed
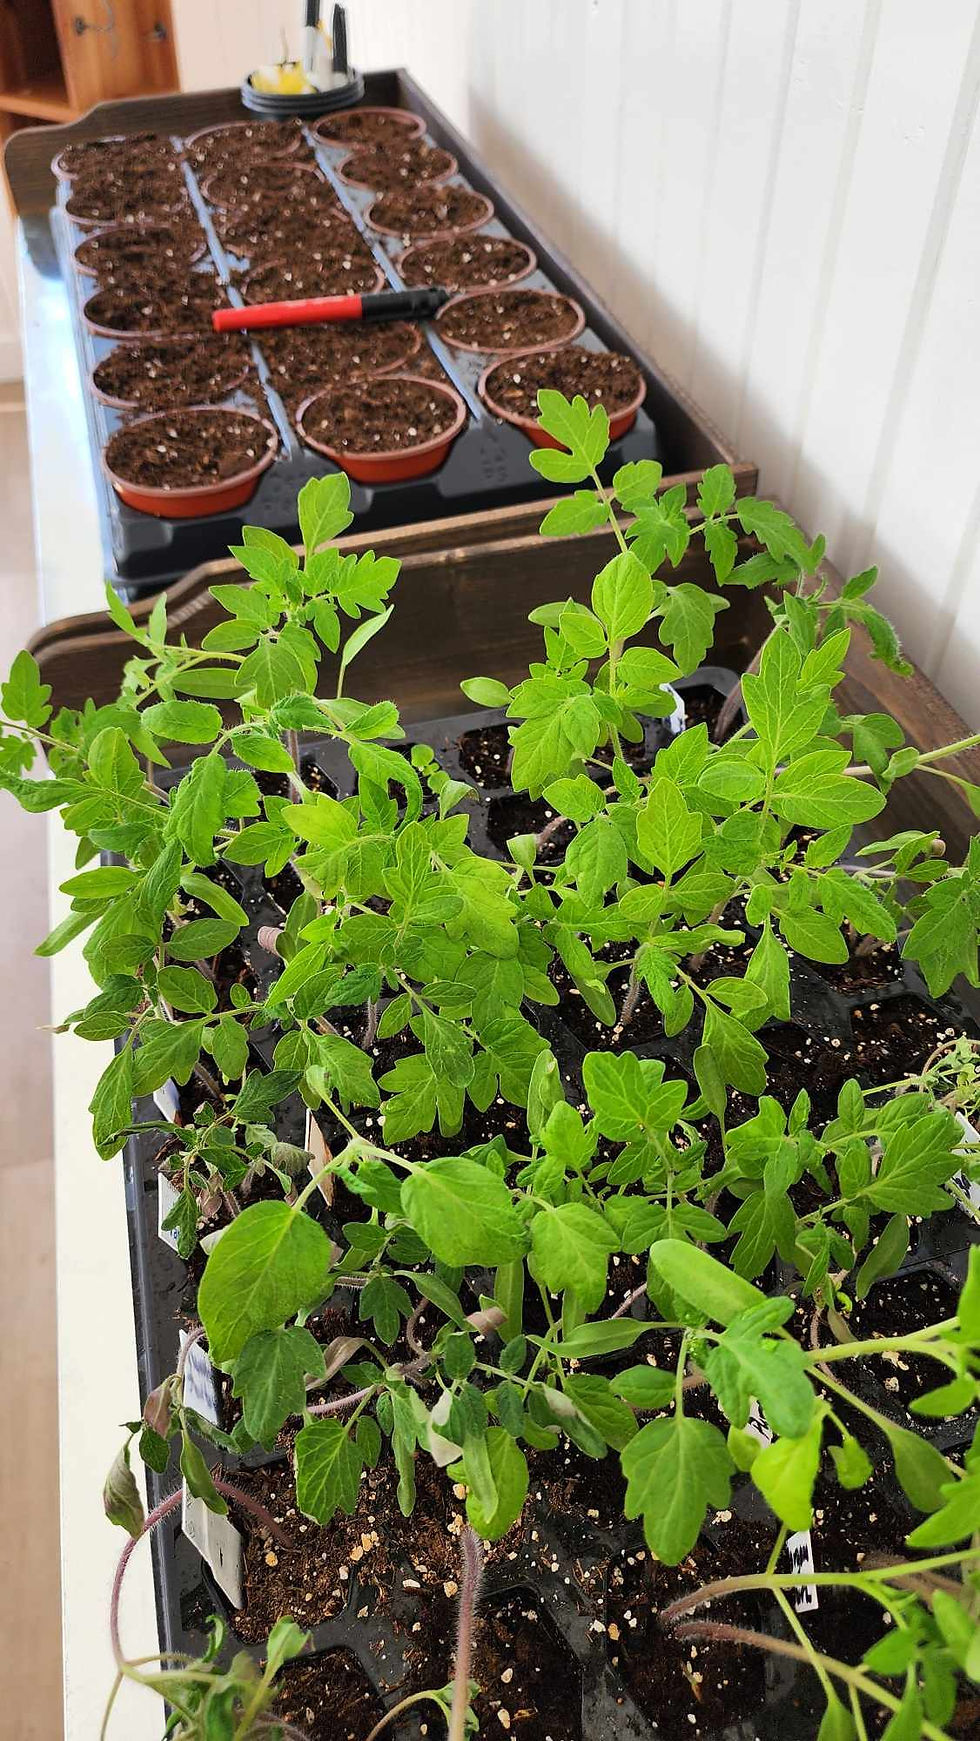
Tomatoes have been transplanted into 2 trays of Vesey's 3.5" pots. That is only 36 plants though so am not sure that will be quite enough. Eek! So hard to decide how many to grow now. I still have quite a few extra seedlings so may pot some up into the large cell packs that came with the starter trays, as a back up plan in case I want/need some more later on.

I have moved the tomatoes out to the potting shed and that is where they will stay until the (unheated) greenhouse is ready for them. The heater is set to 10°C (50°F). This morning the min-max thermometer showed that it only went down to 11 degrees last night, pefect! Here is a similar one that is on sale right now, or this one that is very similar to mine.
I still have the dahlias, peppers, eggplants, and thunbergias to transplant into larger pots. Hoping to get those done today and pop them all into the potting shed so that I can get all the plants out of the grandies' bedroom. The onions will go into the greenhouse.
A note about seedlings. As soon as your seedlings germinate, remember to remove your humidity dome so that you do lose them to damping off. You also want to start keeping them on the dry side. If they are constantly moist, they will be more prone to fungal issues, but also will not be able to access nutrients in the soil. Let them go quite dry in between each watering. Not bone dry so that they wilt, hah, but almost that dry!
Also, a foliar spray is a nice, mild fertiliser that will not burn your roots or leaves, gives them a boost. If you are on the island, get Reindeer liquid seaweed. It is the stuff of miracles, as they say. Reindeer is a small mom and pop that is located mid island (Cowichan) and is bar none the best I have ever used. Even dahlia growers rave over it. I tried a whole bunch of others (you know how I have to do my trials), and can state with confidence that Reindeer is amazing and far surpassed the others. This one comes highly recommended for those of us who do not have access to Reindeer.
To do a foliar spray, you mix the seaweed in a spray bottle (according to the directions) and spray it right on to the leaves. I like to do mine when the sun is shining so that it absorbs right away and does not sit on the foliage for any length of time. You will be able to notice the difference very quickly.

When I am transplanting (or planting up pots and hanging baskets), I use my 'secret' recipe (shh) of 2 parts manure or compost to 5 parts of ProMix or Sunshine #5 potting soil. The potting soils do not have much for nutrients, so adding the compost keeps them growing and flowering, thriving. That way, I do not have to worry about finding liquid fertilisers. My grower friend uses a Cal-Mag fertiliser, which may work better for you if you do not have access (or space) for bags of compost.

I have been unable to get the compost yet this year so I am instead using a bit of Acti-Sol hen pellets (compressed, dry chicken manure). I really love this stuff! Plus added a bit of worm castings just for my seedling transplanting. This is a trial, I have never used castings before so will let you know what I think as they start to grow.
You all... please do not be afraid to try things! You never know what works and what doesn't if you don't give it a go. You learn new things all the time by trying. Even if you read a million blogs and gardening books, like I do, not everything is applicable to your situation. Don't be afraid, if it feels right to you, just do it!

Q&A
Question - How do I prune my raspberries. ( I get this one a lot, lot, lot)
Tanja - Your summer fruiting raspberries are super easy to figure out in spring as the old canes will be splitting and have last year's fruit caps on them. They will literally look old. Cut those off at ground level, leaving only the new stalks that came up last year. They are tall, and straight, will be putting out new leaves right now. No fruit caps or splitting bark.
Everbearing/fall bearing are more complicated. See this how-to.
Question - When do I prune back my raspberries?
Tanja - In spring but after the air and gardens are warm enough for the overwintering insects to have left their winter homes in your leaves, straw, and even from inside the old canes. Leave your perennial flower beds standing till end of April, also.

Question - Do I start watering now that the sun is out and the snow has melted away.
Tanja - You can, in south facing dry areas, but probably will not have to do it yet for the other areas yet. While the ground is dry on top of the soil, underneath is likely still damp, and might even be frozen if it is a shady area. I would wait for a few weeks. The tulips and crocuses that are blooming under your eaves can probably use a drink though as they never get a lot of snow on them and the flowers will soon dry up and die off for the year if it is super dry.

Most all of my week ahead is free so I really hope to get more done this week, even though they the weather is supposed to be cool and yucky for a few days.
Hope you are getting lots done! But hey.. remember if you are not, does not matter. Still super early in the season, no hurry. Hubby will be doing all our raking and dealing with straw, snow mould, etc.. this year as I have been super sick. Pick your battles! There are people you can hire if need be : )


Comments